
Golfstead is reader-supported. When you buy through links on the site, we may earn an affiliate commission at no extra cost to you. Our affiliations include, but are not limited to, the eBay Partner Network and Amazon Associates.
You’d be hard-pressed to find any avid golfer that doesn’t dream of having their own golf simulator setup. And aside from just regular consumers, golf simulators are in demand from professionals, club fitters, and various businesses.
Whatever your reasons are for wanting to put together a golf simulator, there’s almost surely a setup that will be able to meet your needs. A high-quality simulator will allow you to play your favourite golf courses or practice on the range day or night, rain or shine, any time of the year.
But how do you go about building a golf simulator? What do you need to consider, what equipment is required, and which options will suit you best? The task can certainly seem overwhelming.
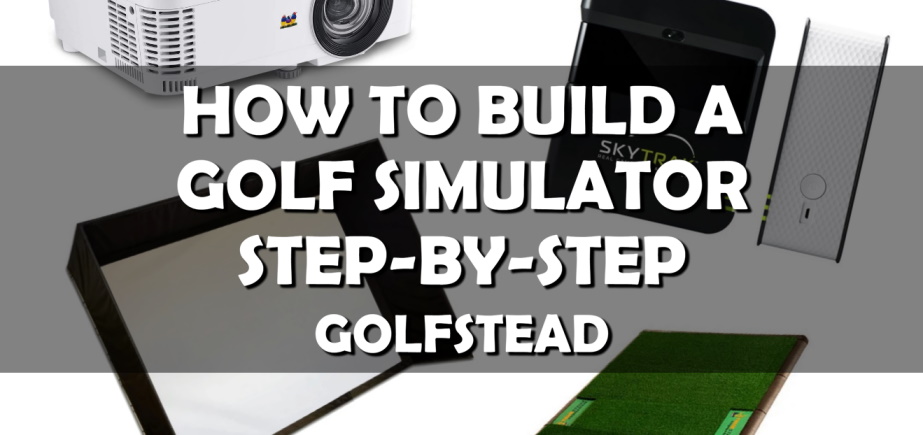
Not to worry. In this guide, we take you step-by-step through the process of building the perfect golf simulator that meets your needs and doesn’t exceed your budget. These steps are (click to jump to the corresponding section):
- Step 1: Consider the space and location.
- Step 2: Choose a tracking system.
- Step 3: Choose your simulation software.
- Step 4: Choose a screen/projector or net setup.
- Step 5: Choose a hitting mat.
- Step 6: Round it out with some accessories.
Of course, this isn’t the only way to build a golf simulator, but in our view, it’s one of the most effective methods that is the easiest to understand and follow.
Note: This guide does not deal with DIYing your own golf simulator, but rather assembling a simulator with brand-name, professionally manufactured components. If you’re interested in constructing a DIY golf simulator, check out this guide.
Step 1: Consider the space and location.
If you’re reading this article, you’re probably looking to build a golf simulator in your home, but others may intend to have it outdoors, in an office space, in a commercial space, or somewhere else.
The most common home spaces where people put a golf simulator are:
- a garage (keeps the simulator out of the home interior but the temperature can be uncomfortable)
- a basement (often has a lower ceiling height)
- a backyard
- a rec or game room
- an office
- a guest room
Whatever the intended location of your golf simulator, we recommend striving for a space that is at least 9 feet high, 15 feet wide, and 20 feet deep. The more space you have, the better.
Most golf simulator setups require a minimum space of 12’L x 10’W x 8.5’H, but you also need to ensure that you can make an unimpeded full swing (backswing and follow-through) with your longest club, typically the driver.
In addition to this, radar launch monitors and tracking systems have a minimum depth requirement — usually a minimum distance from the impact zone to the screen or net, and a minimum distance behind the ball. For example, the Mevo Plus launch monitor requires a minimum 8-foot ball flight and 8 feet between the sensor and the tee indoors, which comes out to a minimum of 16 total feet of depth.
This is why it’s ideal to have ample space so that you don’t have to worry about your golf simulator not being able to fit. It’s also nice if there’s a leisure area off to the side where your buddies can hang out and watch, right?
Lastly, you need to consider the projector and how far away from the screen it will be mounted. Standard throw projectors may require more depth than what the enclosure and launch monitor call for.
It may seem obvious, but it’s worth stressing: before making a decision on a golf simulator, note the size requirements and make sure you have the space. The last thing you want is for your shipments to arrive and for you to discover during assembly that you have to find another room!
Step 2: Choose a tracking system.
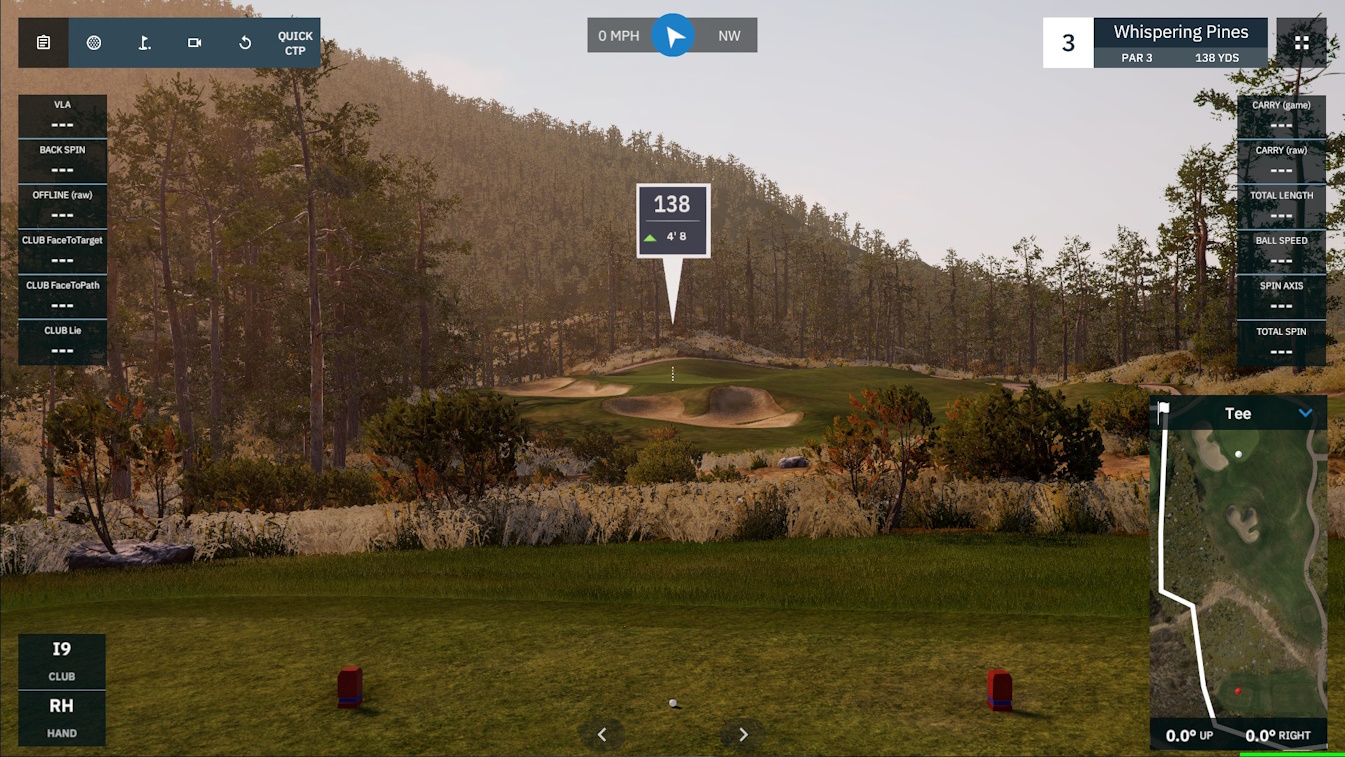
The tracking system is the technological core of a golf simulator. It typically uses advanced camera technology or sensors to measure club and ball data such as:
- ball speed
- spin rate
- distance
- club head speed
- club path
- smash factor
- angle of descent
There are many more data parameters that may be measured depending on the system. But measuring essential variables is what makes golf simulation possible in the first place; without a tracking system, you have no simulator.
Most affordable golf simulator setups use a launch monitor to track data. Sensors and/or cameras mounted on the ceiling or in the ground may be used as well.
When it comes to tracking, we recommend launch monitors for a convenient, easy, economical setup, as opposed to integrated tracking systems found in most plug-and-play simulators.
In general, the cheaper the simulator tracking, the less powerful it will be; it may measure less data parameters or be less accurate, for example. Some of our top recommendations for tracking are:
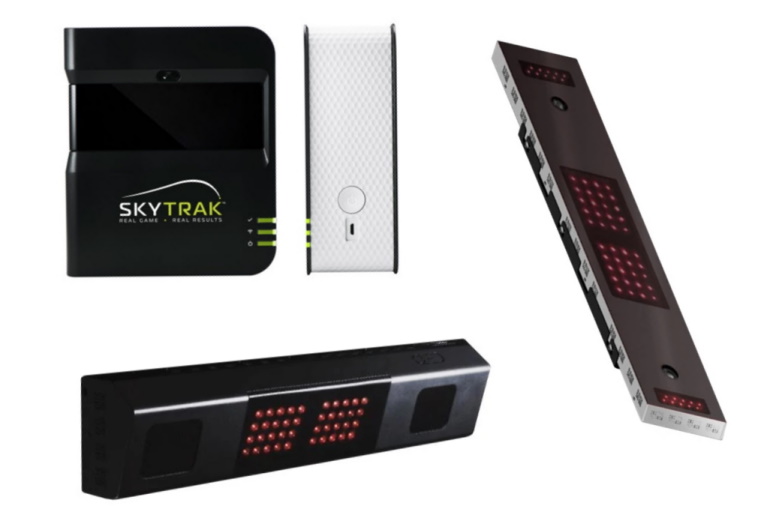
- SkyTrak Plus (ST+) Launch Monitor: incorporates photometric and radar technology to measure ball and club data with no stickers or special balls required: see our full review here; an upgrade to arguably the most successful launch monitor of all time; around $3000.
- Uneekor EYE XO Launch Monitor: a powerful camera-based tracking system mounted on the ceiling; around $7000.
- FlightScope Mevo Plus Launch Monitor: similar to the SkyTrak+ but uses radar technology and works more reliably outdoors; see our full review here; around $2000-$3000 depending on add-ons.
- Garmin Approach R10 Launch Monitor: an awesome budget unit under $1000, measuring plenty of parameters and integrating with the best software on the market; see our full review here; cost starts at $600.
- Uneekor EYE MINI Launch Monitor: essentially a portable version of the EYE XO; has an onboard display and provides a unique Club Optix slow-motion view of impact; see our full review here; around $4500-$6500 depending on package.
- Uneekor QED Launch Monitor: a more affordable version of the EYE XO; around $7000.
- FlightScope X3 Launch Monitor: a powerful radar-based launch monitor that is often used by Tour pros to prepare for tournaments; measures over 50 parameters; includes chipping and putting support; cost is at least $15,000.
You can see our full list and reviews of top recommended launch monitors here.
For the purposes of building a golf simulator piece-by-piece, tracking solutions such as those used with the TruGolf Vista Simulator Series are out of the question because they are exclusive and not sold separately.
There’s also the OptiShot 2 simulator which uses infrared technology and is only a few hundred dollars, but unless you have a tight budget, we don’t recommend this system because of poor accuracy. It provides great entertainment for family and friends, but it’s not terribly useful for improving your game.
Whatever tracking device you choose should be compatible with decent simulation software so that you get the true golf simulator experience. More on this below.
Step 3: Choose your simulation software.
Golf simulation software is needed in order to take the data parameters measured by the tracking system and visualize them in a virtual environment. Without software, all you really have are numerical data points, and that’s not a true golf simulator.
Not all software solutions are compatible with a given launch monitor or tracking system. While there may be technical workarounds that allow you to use software that isn’t officially supported, we don’t recommend most people go down this route.
Here are golf simulator softwares that are compatible with each of the tracking systems listed in the previous section:
- SkyTrak: E6 CONNECT, The Golf Club 2019, WGT, Creative Golf, Fitness Golf, Golfisimo, and ProTee Play
- Uneekor QED & EYE XO: in-house Uneekor software Ignite/View/Refine/Refine+, E6 CONNECT, TGC 2019, Creative Golf, GSPro
- FlightScope Mevo Plus: E6 CONNECT (trimmed or full version), various FlightScope apps on Android/iOS, TGC 2019, Creative Golf, Awesome Golf, GSPro
- Garmin Approach R10: Home Tee Hero, E6 CONNECT, Awesome Golf, TGC 2019, Creative Golf
- Uneekor EYE MINI: in-house software Ignite/View/Refine/Refine+, E6 CONNECT, TGC 2019, GSPro
- FlightScope X3: FlightScope VX app, E6 CONNECT, TGC 2019, Creative Golf, Awesome Golf, GSPro
Now let’s go over the strengths and weaknesses of four of the most widely used simulator softwares:
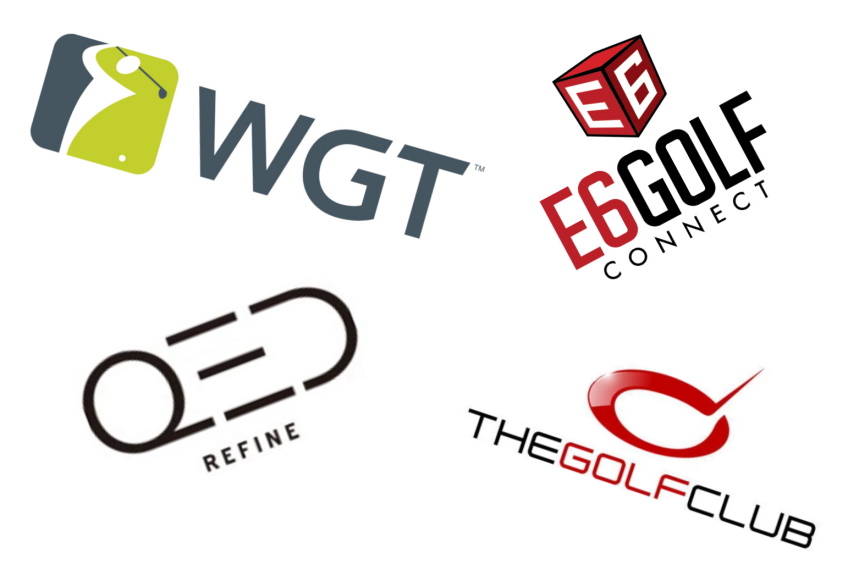
E6 CONNECT
E6 CONNECT probably has the most diverse feature set of any golf simulation software currently on the market. It also has some of the best compatibility across many different devices.
It allows you to do pretty much anything you can think of: practice modes, full 18-hole courses, mini-games, skills challenges, online events, tournaments, and even local multiplayer.
The major downsides to E6 CONNECT are cost and a smaller course selection. The software is very expensive, and if you want additional courses, you’ll have to pay extra. In addition, E6 CONNECT is not available on Android devices.
The Golf Club (TGC) 2019
The Golf Club is another software solution that has an expansive feature set. Among other things, you can:
- do range, chipping or putting practice
- compete in online tournaments
- play multiplayer locally
- play different formats including stroke play, match play, four ball and stableford
The one feature that sets TGC apart the most is the ability to design your own course. Using a special editor, you can customize everything in detail from the theme to the terrain and layout, and then share the course with the TGC community.
The course design feature is the reason that The Golf Club has over 170,000 courses you can play! While TGC is cheaper than E6 CONNECT, it doesn’t have quite as many modes and the course library can be a pain in the butt to navigate.
GSPro
In most golfing communities today, the general consensus is that GSPro is the best software to use for golf simulators. This is because:
- it has the most realistic physics and graphics
- there is a sizeable selection of excellent courses and each recreation is of very high quality
- it offers powerful community features including a course builder and the ability to participate in online virtual tours
- it’s considerably more affordable than comparable simulator software solutions
Courses for GSPro are created using the Open Platform Course Designer (OPCD). Over 490 courses are available for play, and almost all of them are real-world courses, many of which are world-famous.
In addition to this, GSPro has all the game modes you would expect from quality simulator software including practice, tournaments, and stroke play.
Creative Golf
Creative Golf is an interesting software because although the graphics are not as good as E6 CONNECT or TGC 2019, it provides excellent entertainment with course play, a variety of practice modes, and entertaining, quirky mini-games that are family and kid-friendly.
Over 130 courses from around the world are offered, some of which are real and some of which are entertainment and practice courses.
The software also contains challenges (closest-to-the-pin, long drive, etc.), minigames like fairy tale golf and demolition golf, and online tournament play.
Creative Golf is even more affordable than TGC 2019, but you’re not going to get a hyper-realistic golf course experience with it — just keep that in mind.
Our Recommendation
So, once you understand which software options you have (some simulator systems come with software at no extra cost), which ones should you go with?
We recommend choosing a software that you like, has the features you want, and falls within your budget.
We think that most golfers should go with GSPro if it’s compatible with their system because of the realism, affordability, and high-quality course recreations. TGC 2019 and E6 CONNECT can also be good options depending on what you’re looking for.
If you’re using a Uneekor system, we definitely recommend trying their in-house Ignite/View/Refine/Refine+ software first. It’s great software and you’re likely to be very happy with it, although we do not think Refine+ is worth the cost.
Step 4: Choose a screen/projector or net setup.
The Net Vs. Screen Decision

When it comes to golf simulators, one of the most important decisions anyone can make is whether they want to use a screen & projector or a net. In general, there are two options:
- Hit shots into a large impact screen that also serves as the projection canvas for the simulation software output.
- Hit shots into a net and view your shot data and ball flight on your computer or mobile device.
Whichever way you go, you’ll be connecting your launch monitor to a computer or tablet that has the simulator software installed.
A screen projection will be the more expensive option — often much more expensive, depending on the size and makeup of the enclosure. This is the way to go if the full golf simulator experience is important to you and you want to mimic the feel of playing golf in real life.
On the other hand, if seeing your shot data and ball flight on a phone or tablet is good enough for you, then you should go with a net because in most cases, it’s significantly less expensive.
If your goal is being able to work on and improve your game from the comfort of your home, some would argue that it shouldn’t matter if your shots are projected on a big screen in front of you or not. But that’s something you’ll have to decide for yourself.
In terms of stats, the usage of a net versus a screen is more or less split between all golf simulator owners.
Choosing A Screen, Enclosure & Projector
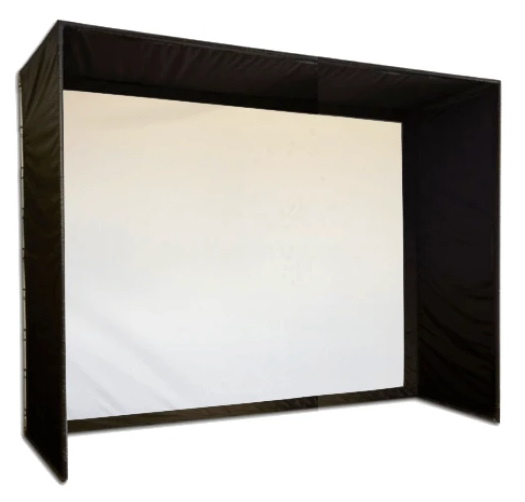
If you’ve decided to go the screen/projector route, we strongly recommend a good enclosure to go with it. An enclosure with upper and side walls will help block out light to make the projection more visible, and it will also help contain wayward shots.
Screen & Enclosure
Note that some enclosures, like The Net Return Simulator Series, are built with an impact screen and netting behind it. In this sense, you get a hybrid screen/net setup, which can work well but usually isn’t as good as a dedicated screen/enclosure system.
Assuming you already have The Net Return Pro Series or Home Series net, you can buy a Pro Series or Home Series screen that are designed to hang from the top of the net with Velcro attachments.
As another example, The Indoor Golf Shop’s SIGPRO Net is designed to integrate with their Preferred and Premium impact screens with a top crossbar.
If you want a full enclosure, we recommend one of five options:
- the SIG10 Golf Simulator Enclosure (sold by The Indoor Golf Shop)
- the PerfectBay Golf Simulator Screen Enclosure (sold by Top Shelf Golf)
- the Carl’s Place C-Series DIY Golf Simulator Enclosure (sold by Carl’s Place)
- the SwingBay Golf Simulator Screen & Enclosure (sold by Rain or Shine Golf)
- the PlayBetter SimStudio (sold by PlayBetter)
These enclosures have large, high-quality screens, solid framing systems, and durable blackout side and upper walls.
Another great screen/enclosure option, the HomeCourse ProScreen 180, is ideal for those who would like a retractable setup that will allow them to return a room like a garage or basement back to its original form in seconds. Simply press a button and the whole setup will retract in less than 30 seconds.
Alternatively, you can:
- build or acquire your own enclosure frame and attach a standalone screen to it. One of the best places to get high-quality standalone screens is Carl’s Place, which offers three material and three finishing options.
- buy your own frame piping at the hardware store and use a DIY Golf Simulator Enclosure Kit.
Projector
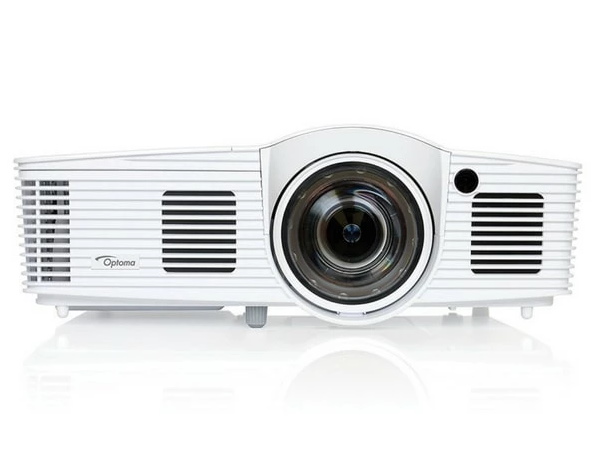
As you surely know by now, a projector is what takes the output of the simulation software on your PC or tablet and projects it onto the big screen. You may assume that just about any projector will work well, but there are a few things you need to look out for.
Firstly, we recommend using short throw projectors with golf simulators. These projectors have a throw ratio of less than 1:1 and can produce a large image from a short distance away. The reason why this is important is that you want to be able to position your projector between yourself and the screen so that you don’t cast a shadow when you’re hitting shots.
You can use a non-short throw projector with a golf simulator, but you’ll need to either mount it on the ceiling or position it in such a way as to minimize shadows.
Another thing to take into consideration is the lumens output of the projector. The higher the lumens, the brighter the image will appear given the ambient lighting in the room.
If you plan to have a fair amount of ambient lighting in the room, a lumens output of 3500+ will ensure a bright and clear image at all times. Darker rooms can get away with 2500 or more lumens.
Other things you should look at are:
- the aspect ratio of the projector. You should ensure that the projector supports the aspect ratio your screen is designed for. The screens we recommended above, for example, are meant for a 4:3 aspect ratio and so should receive a 4:3 projection.
- the resolution of the projector. This is closely related to the aspect ratio; 1080p (1920×1080) projectors, for example, will support a 16:9 aspect ratio but can also operate at a 4:3 resolution.
So, which projectors do we recommend for a golf simulator? Here are a few of our top recommended models, which you can learn more about in our dedicated projector guide:
- Optoma EH200ST Short Throw Projector (1080p)
- BenQ LK936ST 4K Laser Short Throw Projector
- Optoma EH412ST Short Throw Projector (1080p)
The Optoma models are included in many of the best simulator packages on the market, and the BenQ model is a dream for sim owners.
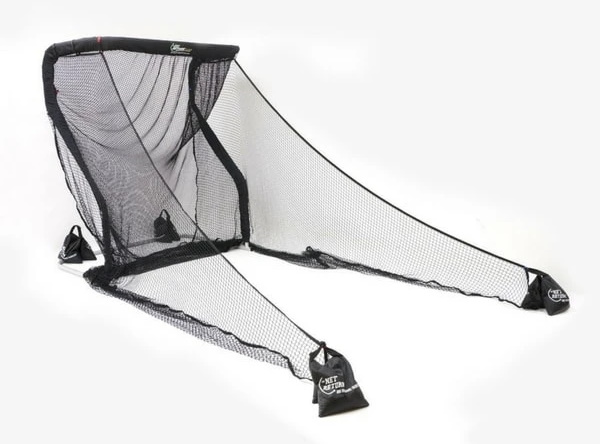
Choosing A Net

If you’re prone to shanks and other directional mis-hits, it would be a good idea to get a wide net of at least 7 feet; this will give you a nice cushion to minimize the chances of a rogue ball that could damage property.
One of the best larger net options is the The Net Return Pro Series V2. This is a quality, tried-and-tested, portable net that has a strong tubular steel frame and can withstand ball speeds of up to 225 mph.
If you’re a skilled golfer with a tight dispersion, you probably won’t need a large net; in this case, something like the Mini Pro Series or Home Series nets by The Net Return are very attractive options.
There are also nets like the Cimarron Masters that are meant for a permanent outdoor setup. With this kind of net, you could bring your launch monitor and hitting mat outside whenever you want to get in some outdoor practice.
If your net has an iron or steel frame and you want to use it outdoors, make sure to keep it out of the rain and store it indoors to prevent rusting.
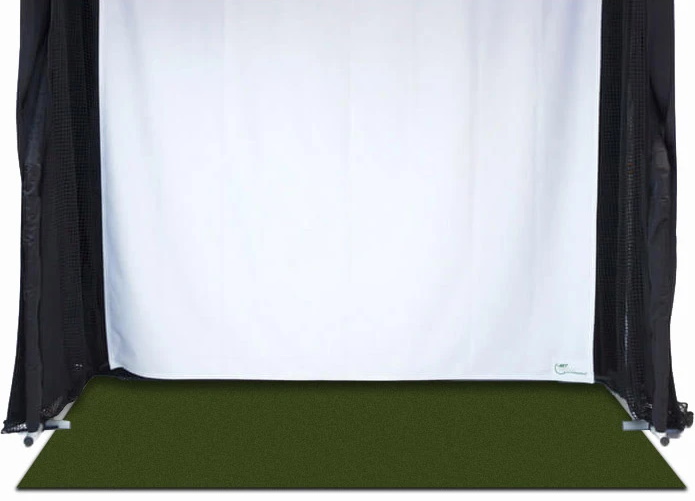
Step 5: Choose a hitting mat.
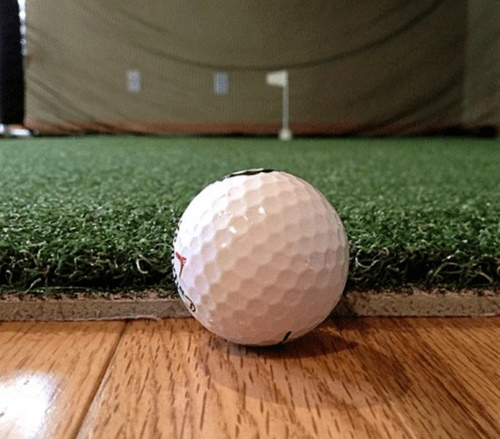
When buying your hitting mat, the first thing you should do is decide if you want a large mat, standard-size mat, or small hitting strip.
Larger mats have many benefits that you might not think of at first. Not only is it better to stand on the mat you’re hitting from for stability and realism, but larger mats offer more surface area to hit from as spots wear out.
Mats that are long enough can also be used as landing turf to protect your floors. Large mats may also double as a putting or chipping green. Two of the best large mats available on the market are:
- Fiberbuilt Double-Hit Combo Mat: comes with two hitting strips, a stance mat, and a putting/chipping green (up to 10’x16′ total size!)
- The Net Return Pro Turf Mat: 10′ length allows for landing turf usage; portable; can be used as a putting green with cup and flag accessories
If you don’t care about your hitting mat having putting functionality or serving as landing turf, there are plenty of excellent standard-size mat options. The ones we recommend are:
- Fiberbuilt 7’x4′ Studio Golf Mat: top user ratings; very high-quality turf that mimics real course grass; spacer panel takes ball trays and launch monitors
- SIGPRO Softy Golf Mat: designed by The Indoor Golf Shop; available in 4’x10′ and 4’x7′ sizes; 100% made in America; soft and realistic; not too grabby, firm or forgiving
- Carl’s Place HotShot Golf Mat: designed by Carl’s Place; available in 4’x5′, 5’x7′ and 4’x9′ sizes; easy on the joints and soft; has a pre-cut replaceable hitting strip
- SwingTurf Golf Mat: highly-rated mat designed by Rain or Shine Golf; strikes an optimal balance between forgiveness and realistic fairway-like feel; gives great shot feedback
We recommend SIGPRO and Carl’s HotShot mats in particular because they feature a stance mat along with hitting strips that can be continually replaced with new ones as they wear out. We discuss hitting strips more below.
In the event the hitting mat is to be used by both righties and lefties, you should get a hitting mat with a strip in the middle and stance mats on either side, like the SIGPRO 4’x10′.
If you want a hitting mat with great feel and that holds up well to wear and tear, we don’t recommend cheap models under $60. But there’s still a way you can save big: get something like the Fiberbuilt Flight Deck Mat, which is only 1.77′ x 1.13′ but gives you enough area to tee it up or place your ball on quality turf.
To read more about our top golf hitting mat recommendations, go here.
Step 6: Round it out with some accessories.
You can certainly get by on a great golf simulator setup with the essential components that we’ve covered thus far. There are other things to consider, though. Let’s go over arguably the most important of them:
Projector Mount
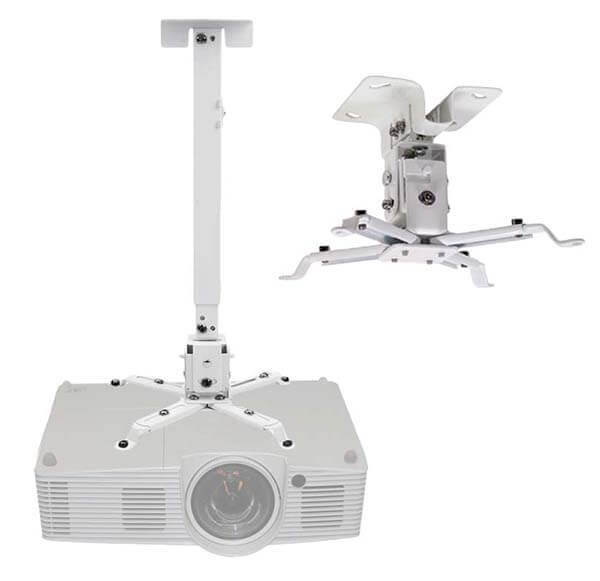
You can’t just put your projector anywhere when you’re hitting shots; it needs to be protected when your golf balls are flying all over the place. This leads us to the three main ways of positioning your projector:
- Mount it from the ceiling using a projector ceiling mount.
- Mount in on the floor using a shielded projector floor enclosure.
- Place it behind you on something like an AV cart.
Ceiling and ground mounting are both excellent options because there typically won’t be any problems with shadows. Get an excellent floor mount here and a universal ceiling mount here.
We would argue that ceiling mounting has an edge because the projector is out of sight and not a distraction, but a floor mount offers guaranteed protection from rogue balls.
Using a cart or shelf is less ideal but still a good, simple option. You can get a quality steel AV cart with adjustable height here.
Side Netting
Side netting extends from both sides of a net or enclosure. They are barriers that help contain poor shots.
Your net or enclosure may come with side barrier netting, but if it doesn’t, you can get good netting online or from your local sporting goods store. The Net Return also offers several side barrier netting solutions.
Most side netting will have a hooking mechanism or require sandbags to keep it secure.
For example, this affordable side netting from Rukket Sports works great for multiple sports including golf, softball, baseball and lacrosse.
Putting Green
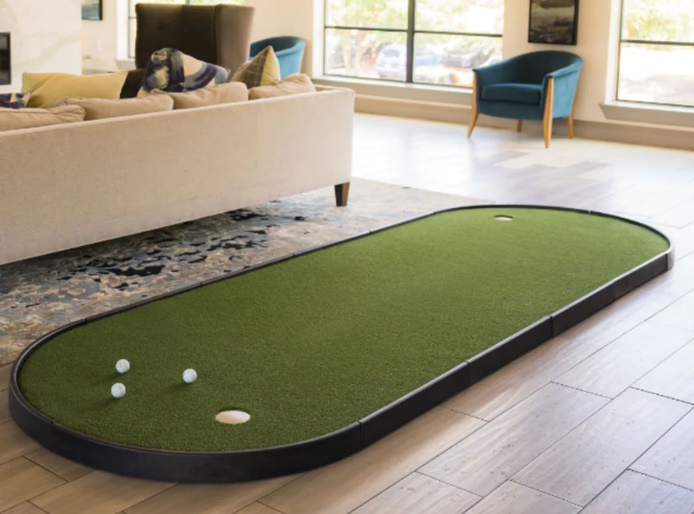
Putting greens aren’t strictly a part of a golf simulator but they are an ideal complement to it. Because many golf simulators don’t work well with putting and chipping, a putting green will allow you to practice every part of your game in one place.
Ideally, you want a well-made putting green with a true, realistic roll. Whether you want a putting green strip with ball return or a large putting green complex with different cups and breaks (more expensive) is a matter of preference.
Some of our top recommendations for putting greens are:
- PrimePutt True-Roll Putting Green
- SIGPRO Tap-In Putting Green
- Camry Golf DIY Putting Green
- Perfect Practice Putting Green (strip)
There’s another way to integrate a putting green seamlessly with your golf simulator, and that is with SIGPRO Golf Simulator Flooring. This flooring features a replaceable hitting strip surrounded by a putting green with four cups and is designed to integrate with SIG enclosures.
Check out our guide on the best indoor putting greens here.
Hitting Strip
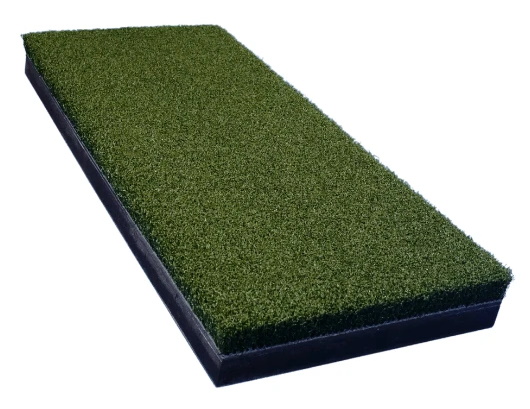
Many golf mats have hitting strips that will wear out over time from repeated golf club impacts. At that point, you’ll need a replacement.
However, it can be notoriously difficult to get a hold of standalone hitting strips (especially with the right dimensions) from the same brand that you got your hitting mat from. Many companies don’t make it easy for people because they want them to pay full price for an entirely new mat.
One of the best options out there when it comes to hitting strips is The Indoor Golf Shop. They offer three different strips: 3D, Softy and Preferred, each with their own unique qualities. They are designed to fit the SIGPRO Golf Mat but can be adapted to other hitting mats if desired.
You can also get a good quality hitting strip separately from Carl’s Place.
Landing Pad Turf
It’s not wise to let your golf balls bounce on hard floors or even carpets after every shot. Landing turf protects your floors, gives your simulator a finished look, and can serve as a putting or walking surface too.
You can get landing turf that is designed to be paired with certain golf simulator enclosures like the SIG12 and SwingBay. For a tight-budget solution, buy cheap turf (preferably turf that looks like grass to keep the look congruent) at a hardware store.
You can either add landing turf just below the screen, or cover the entire area between the screen and hitting mat with turf. The latter option will obviously be more expensive but look the best.
The SIGPRO Simulator Flooring discussed above also serves as landing pad turf since it extends from the hitting zone to the impact screen.
Other accessories might include connector cables, tees, and screen or net covers, but many or all of them will be optional depending on your situation.
Conclusion
When building a golf simulator, it’s easy to mix and match components to achieve a setup that you really like.
Want to use a SkyTrak+ with The Net Return Home Series Net and The Net Return Pro Turf Mat? You can do it. Want to step it up with a Uneekor QED system, SIG10 enclosure, floor-mounted short throw projector, and Fiberbuilt 4’x7′ Studio Mat? You can do it.
Depending on your choices, you could spend less than $1000 or up to $20,000 or more. There is a golf simulator setup that can meet practically any budget.
Now, picking out each golf simulator component separately is certainly possible. But most of the best golf simulator stores out there offer simulator packages, which are very convenient and include everything you need in one purchase.
Full golf simulator packages make the whole process of buying and setting up a golf simulator much simpler, without headaches and without getting overwhelmed.
The five top destinations that we recommend for golf simulator packages and individual golf simulator components are The Indoor Golf Shop, Carl’s Place, Rain or Shine Golf, Top Shelf Golf, and PlayBetter.
Carl’s Place, in particular, offers a special tool that walks you through building your dream golf simulator in a step-by-step fashion.
We have no doubt that this step-by-step guide and the links within it will help you turn your dream of owning a golf simulator into reality!
Thanks for reading this guide. Is there something else you want to know about building a golf simulator? Feel free to leave a comment below.


