Golfstead is reader-supported. When you buy through links on the site, we may earn an affiliate commission at no extra cost to you. Our affiliations include, but are not limited to, the eBay Partner Network and Amazon Associates.
The QED was the launch monitor that “started it all” for Uneekor. Launched in 2019, it was Uneekor’s first product and first launch monitor to utilize dual high-speed cameras along with infrared technology.
The QED is designed to be mounted overhead, allowing for a mostly hands-off experience and seamless hand switching. It offers detailed ball and club data analysis features with video recordings of the moment of impact.
In this Uneekor QED review, I’ll take an in-depth look at the launch monitor. I’ll look not only at how well it measures ball and swing data, but also at its features, usability, and simulation capabilities.
How does the QED perform? How does it compare to other launch monitors like the GC3? Is it worth getting if you’re looking for a quality golf simulation experience?
Here’s what I’m going to be covering in the review:
- What is the QED?
- Setting Up The QED
- Parameters & Features
- Simulation Options
- Pricing & Plans
- Where To Buy The QED Online
- Conclusion
Ready to try the QED right now? Click the button below or scroll down to the bottom of my review to see my final verdict!
Note: In the majority of cases, launch monitors tested on Golfstead are acquired temporarily and are not purchased. The review that follows is based on personal experience and research. Although the author makes every effort to ensure proper setup of the device and do direct comparisons with other launch monitors when possible, there are many variables that can affect data readings and performance. Therefore, exact results with a particular launch monitor may differ from person to person.
What is the QED launch monitor?
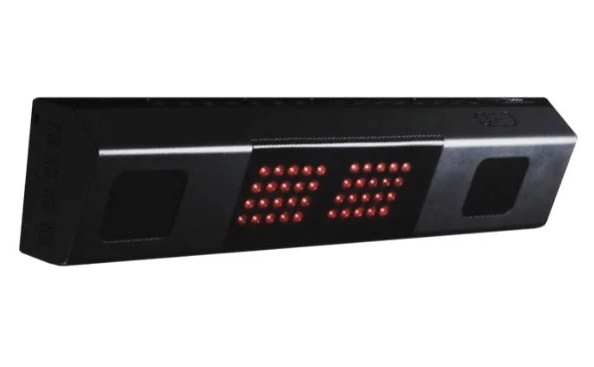
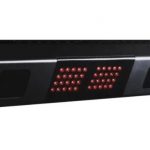
The QED is an overhead launch monitor that tracks an array of ball and club data parameters by means of two high-speed cameras and infrared tracking.
The cameras contained in the QED bar can operate at over 3000 fps and pave the way for QED Optix technology, which allows you to view slow-motion recordings of the ball’s spin and the club impacting the ball.
The QED is designed to be accessible to golfers of all skill levels. With a one-time installation, it offers a hands-free, uninterrupted experience with seamless left and right-handed play.
In addition to measuring ball and club data, the QED is compatible with the best simulation software on the market including GSPro and TGC 2019.
The QED also comes with Uneekor’s own in-house software called Ignite, which offers Optix recordings, a 3D driving range, fitting data, and a swing motion analysis tool. The Ignite software can be upgraded to Refine or Refine+ software which provides full course play and other additional features.
The QED is generally an indoor launch monitor because it needs to be mounted overhead in a fixed position. It also must be used with software in order to view the measured data, so in this sense, it’s essentially a golf simulator.
Setting Up The QED
You need to follow a specific process to install the QED. It must be securely mounted to the ceiling with cables connecting the sensor bar to a PC and wall outlet.
Uneekor recommends that the mounting of the bracket be performed by two or more people for safety, as it will require standing on a ladder. It should be installed to a level and stable surface that can support approximately 30 pounds.
In this section, we’ll provide a rough overview of the installation process, but for the full details, you should consult the official installation manual for the QED.
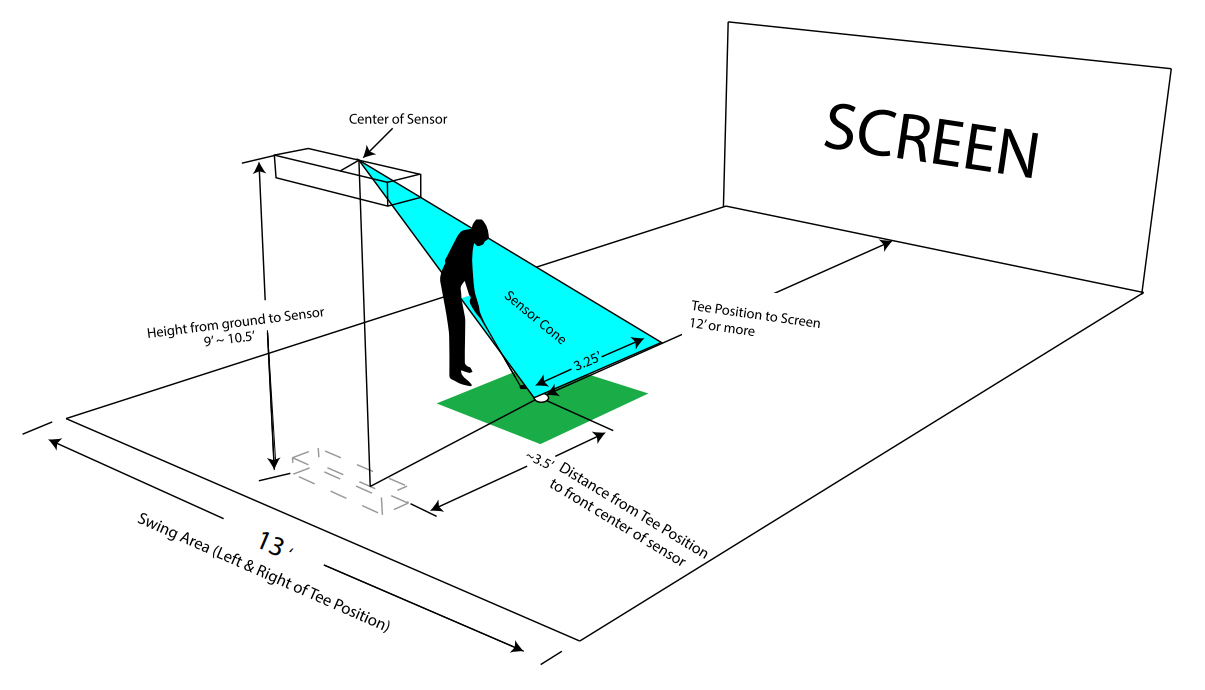
First, let’s talk about the layout. Ideally, the QED bar should be mounted 9-10.5 feet from the ground, and the front of the bar should be about 3.5 feet behind the tee position. The screen should be at least 12 feet from the tee position.
See below for an illustration:
The QED bar can mounted in a covered area outside, but only if it’s completely shielded from precipitation and high humidity.
Step 1: Mount the bracket.
First, slightly loosen the black 15mm screws holding the sensor to the bracket, and then remove the sensor.
Then, place your ladder under the mounting location, making sure the front of the sensor will be 3.5 feet from the tee position.
Climb the ladder and place the bracket flat against the ceiling with the hinges facing down towards the ground. The logo should be on the side of the hitting screen.
Take the silver 32mm screws. From the orientation where the Uneekor logos are upright and on the bottom, first screw in the top second hole from the left and then the bottom second hole from the right. Then, screw in the rest of the holes in any order.
Step 2: Install the sensor.
First, ensure that the six screws already inserted into the bar are about halfway down.
Then, slide the bar with the screws through the bracket, making sure the screws are secured in the hinge slots. You may need to tighten the screws slightly in order for them to fit properly.
Once the bar is secured, tighten the screws fully.
Step 3: Establish connections.
Connect the Ethernet LAN cable from the sensor to your PC through the Ethernet port. Connect the power cable, power adapter, and power connector. Then, flip the red switch on the sensor.
Verify the power is on by observing the bright red light on the sensor’s switch.
Pair the QED to your PC by setting the static IP addresses according to Uneekor’s Network Settings Guide. Use the provided connection checker tool transferred to a USB stick to verify the sensor’s LAN connection.
Step 4: Install software.
You will then need to install the Ignite, Refine or Refine+ software depending on your purchase.
Uneekor will provide the installation code in an email, and you need to follow the steps as required in the installation manual. All relevant installation files are contained in the included USB stick.
Uneekor Launcher
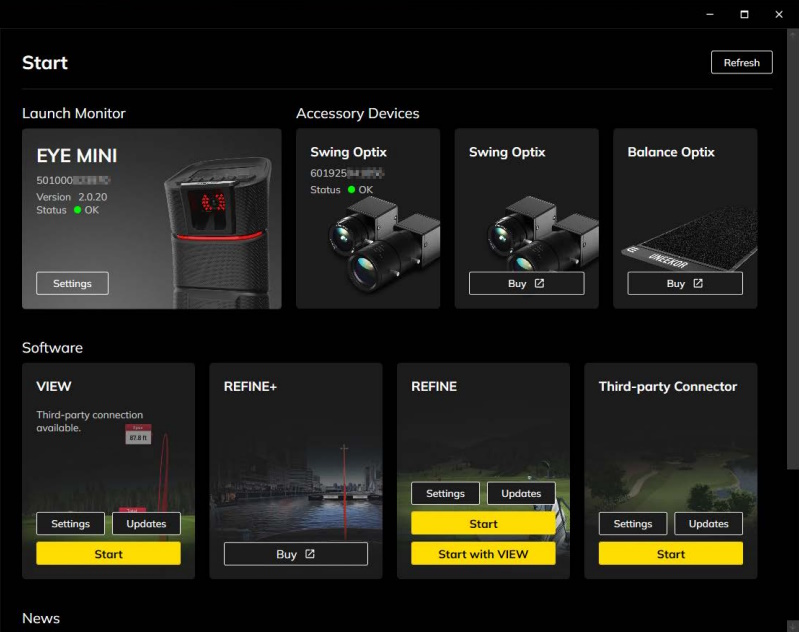
If you’re using the EYE XO or any Uneekor device for that matter, I recommend installing and using the Uneekor Launcher.
This program is now the convenient all-in-one hub for everything related to Uneekor. From the launcher, you can not only go through an interactive installation wizard for the EYE XO, but you can also access the View software, connect to third party solutions, and manage all other devices including accessories.
Additional Notes
- the QED requires you to hit specially marked balls. 24 marked Bridgestone balls are included with the launch monitor, and more can be purchased from the Uneekor website.
- your PC should have minimum specifications of Intel i5 8400, 8GB RAM, GeForce GTX 1060, and Windows 10 (64-bit, version 1803). AMD is not compatible with the QED.
- the QED should be calibrated before first use using the provided calibration tool. The steps for calibration can be found here.
- your hitting mat must be level in order to receive accurate shot data.
- in order to measure club data, club stickers (included) need to be applied to the club head. The location of application depends on the design of the club head; you can find out more here.
- Windows Defender Firewall can cause issues during installation. To fix this, you need to allow the “Z3Cam TOOL” and “z3Cam” apps within the firewall settings.
If you need help during any part of the setup process, you can reach out to support@uneekor.com.
Parameters & Features
Data Parameters
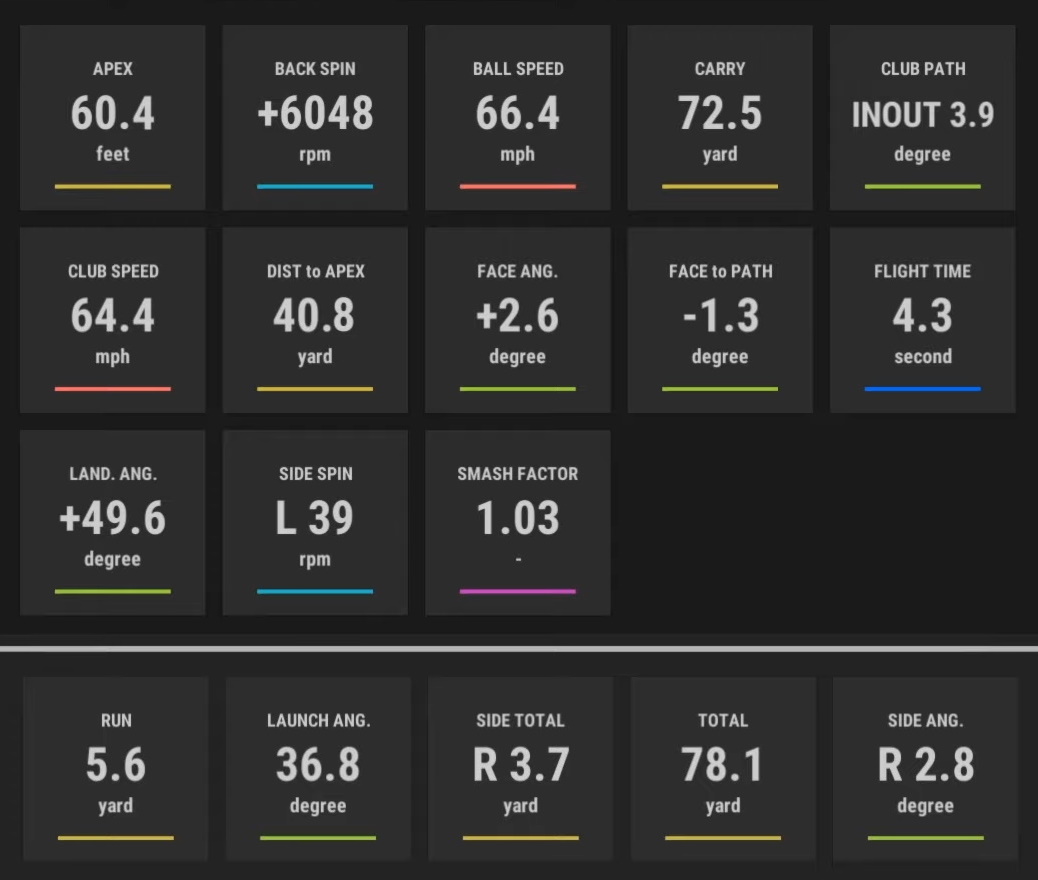
The QED can measure 14 total data parameters. The ball data points are:
- carry distance
- ball speed
- total distance
- run
- distance to apex
- side and back spin
- launch angle
- side and total angle
- angle of descent
After applying club stickers, the following club data can be measured:
- club head speed
- club path
- smash factor
- club face angle
- club face to path
Accuracy is comparable to top-of-the-line launch monitors like the GCHawk and FlightScope X3. Any minute differences in accuracy will be imperceivable to the vast majority of users. I would say that readings differ from these launch monitors by no more than 0.8% in any situation.
QED Optix
QED’s Optix technology is made up of three components:
- Ball Optix: shows the actual spin of the golf ball after every shot.
- Club Optix: shows slow-motion video of the club hitting the ball in real time, taken by the QED’s high-speed camera.
- Swing Optix: allows for multi-angle video capture with slow-motion playback and drawing tools. Additional cameras are sold separately; you can purchase Uneekor’s special Swing Optix cameras or use third-party solutions.
Simulation Options
Currently, the QED launch monitor officially supports golf simulation with QED Ignite/Refine/Refine+ (in-house), E6 CONNECT, The Golf Club 2019, Creative Golf (with Golfisimo), and GSPro.
Let’s go over each option briefly:
QED Ignite/Refine/Refine+
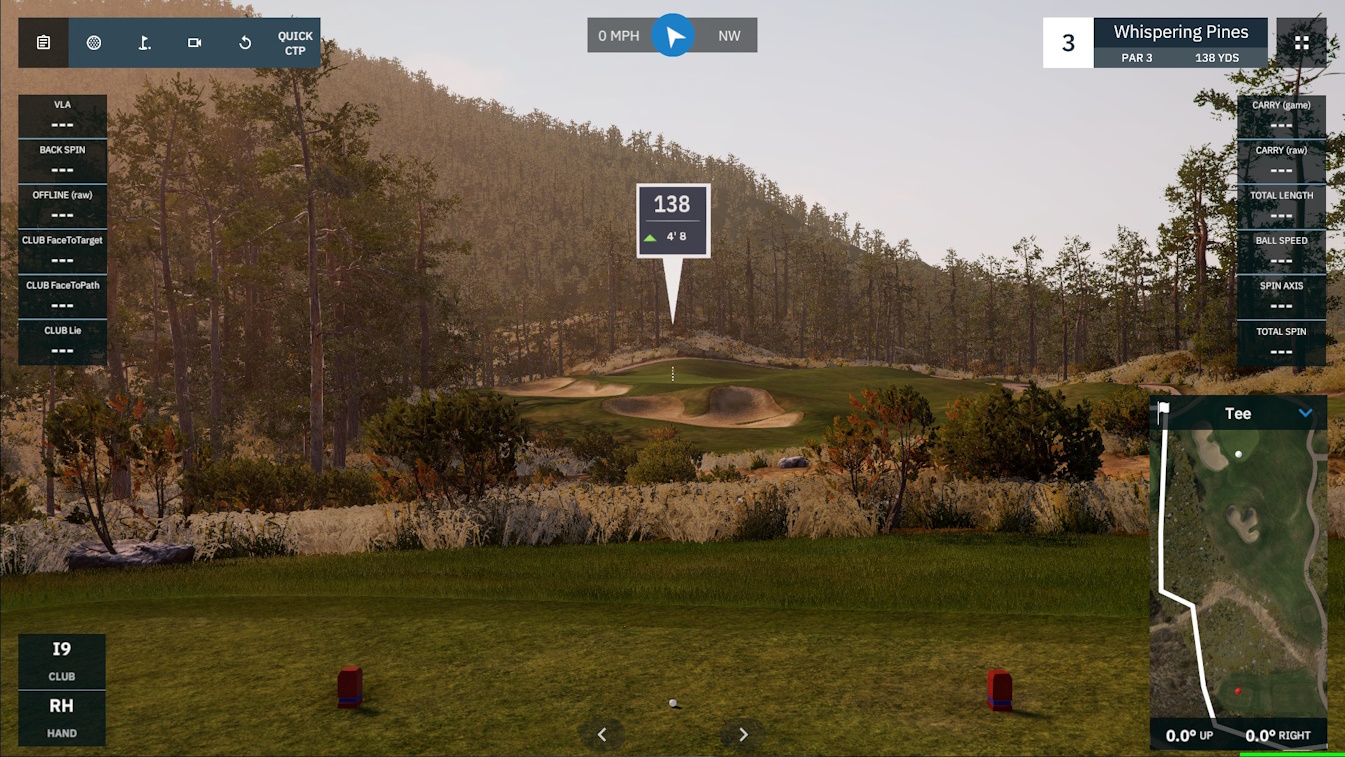
The QED Ignite software looks like this:
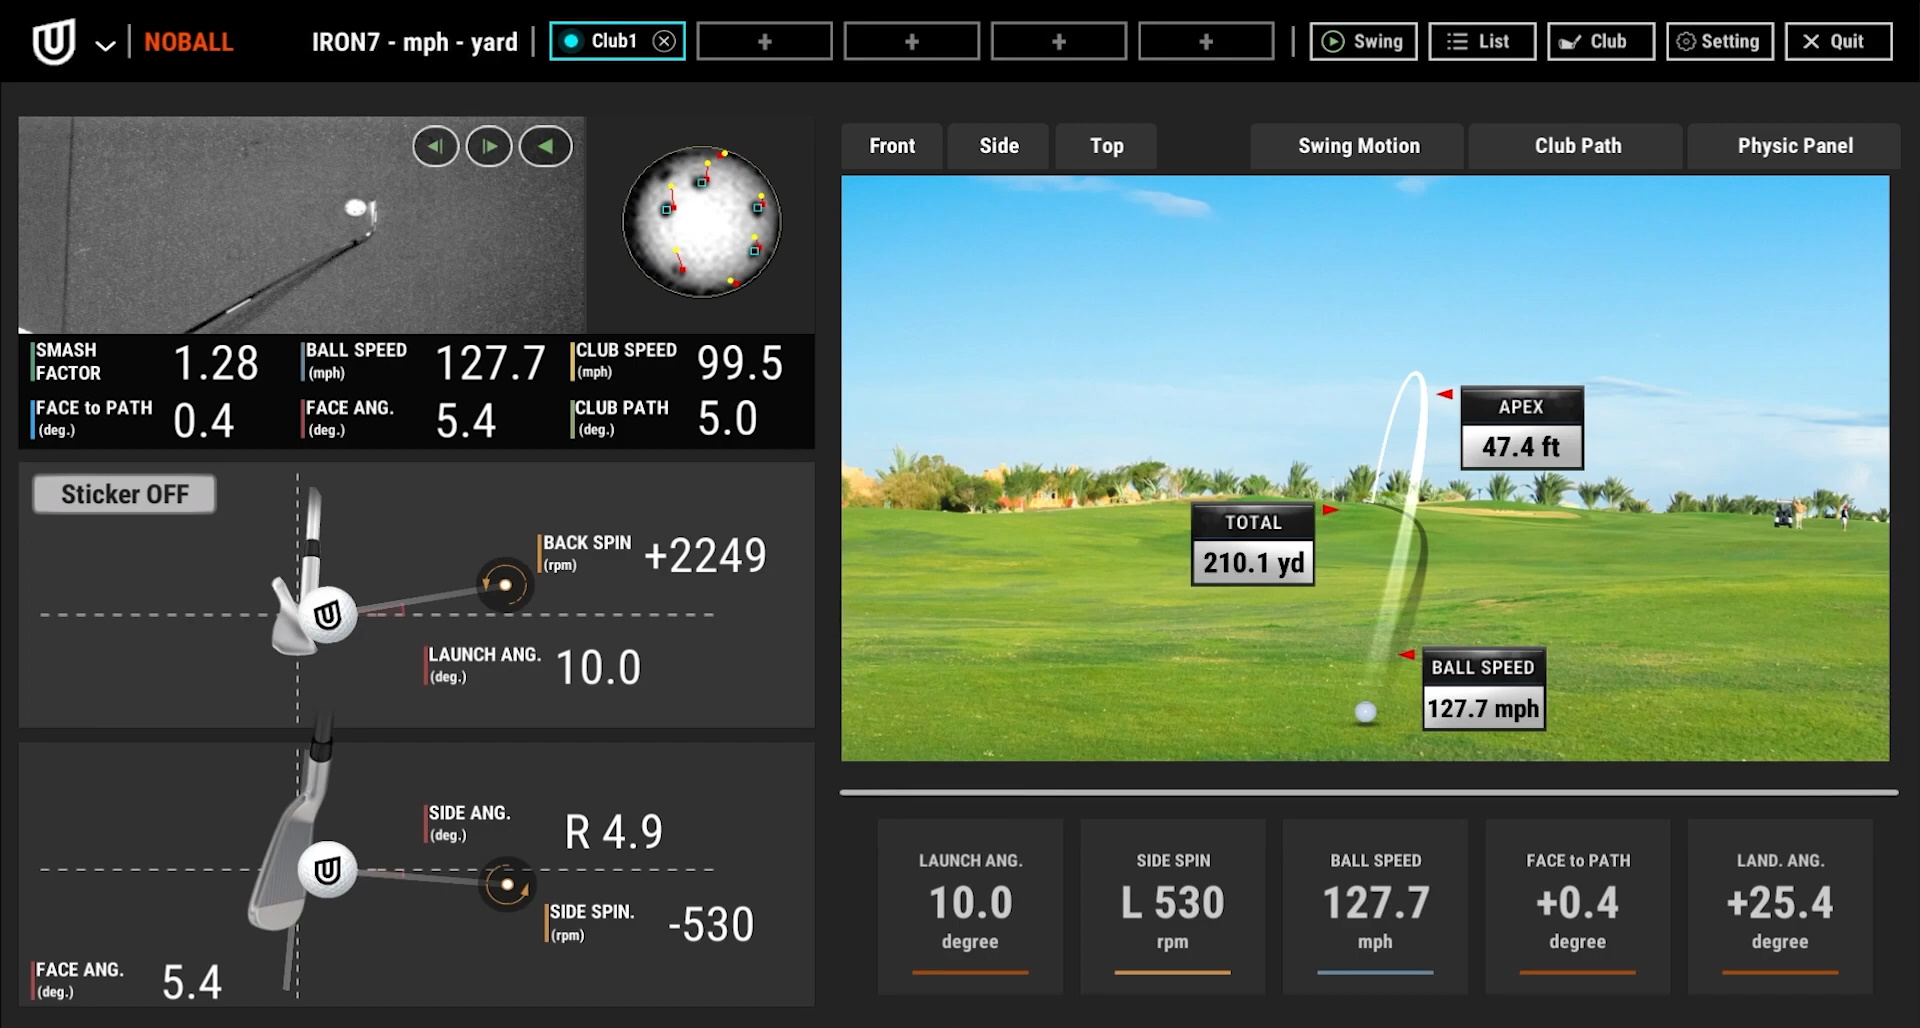
As you can see, there’s a 3D trajectory view in a virtual environment with front, side and top views. There is video of the ball’s spin at impact and the club impacting the ball.
The software arranges data in a visual format to make analysis easier. Images are produced that show the position of the clubhead relative to the vertical and horizontal plane.
You can change the following in the Settings tab:
- hand: left or right
- speed units: mph, m/s, yd/s, or km/h
- distance units: yards or meters
- camera & resolution
- sensor
- ready sound
- AutoTee
- altitude
- trajectory type
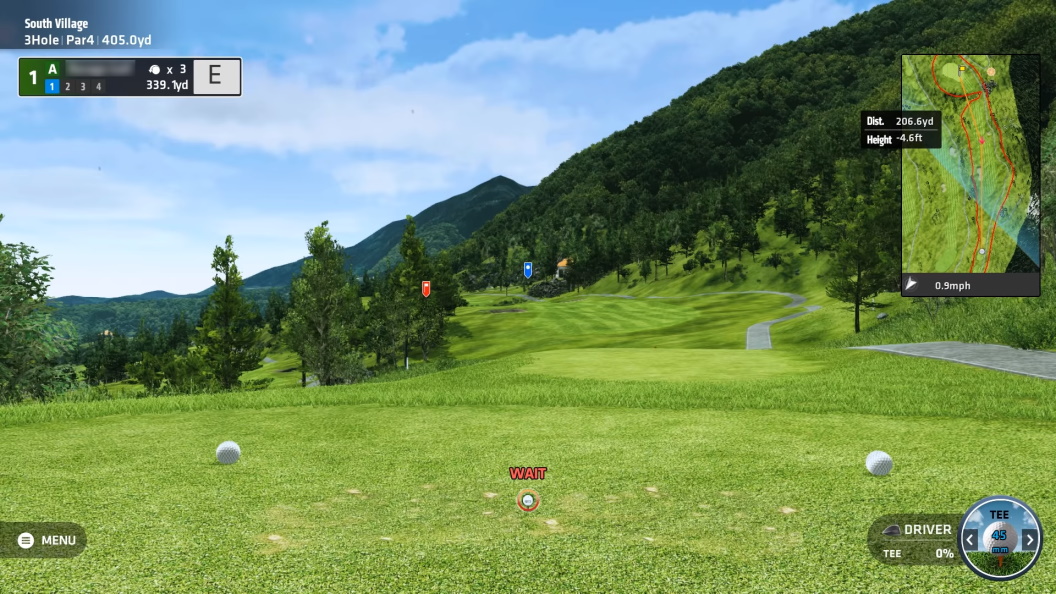
The Refine software upgrade introduces a whole new set of features: course play on five courses, multiplayer with up to six players, three driving ranges, a short game training mode, an on-course practice mode, and QED challenges.
The Refine+ upgrade (formerly Succeed) adds 15 additional golf courses. These are non-US courses based in Asia.
In my opinion, the Refine+ upgrade is not worth the cost. However, Refine is excellent and gives you great value for your money.
If you’re not interested in third-party software, I definitely recommend the Refine upgrade since you get practically every feature you could ever want except for online play.
E6 CONNECT
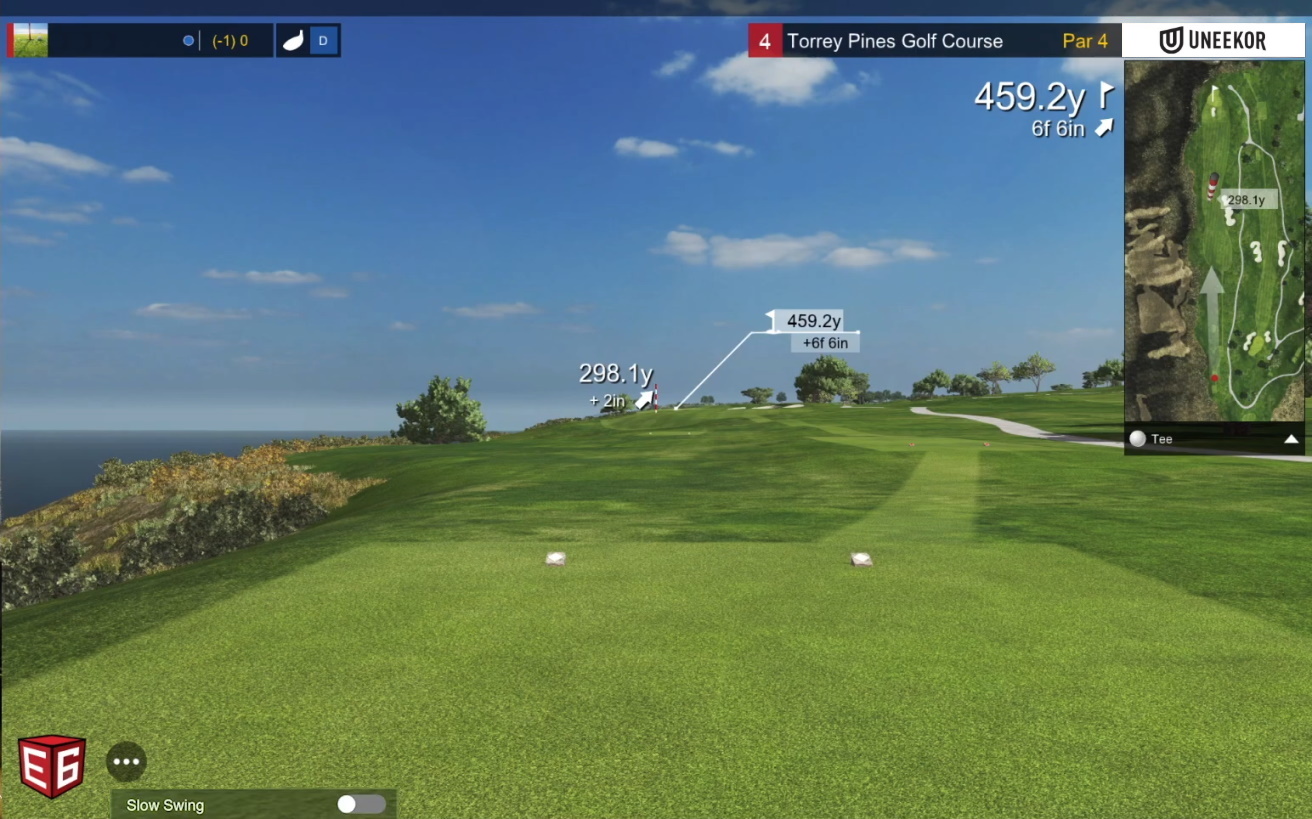
E6 CONNECT is top-tier golf simulation software known for its quality and diverse range of features. With the QED, you can purchase the full PC version and get:
- a full driving range and practice area
- tournament play and online events
- an array of multiplayer formats
- flexible gameplay settings (mulligans, wind, weather, etc.)
- minigames including Long Drive and Closest To The Pin
A Basic subscription to E6 CONNECT provides access to P2P gameplay and a library of content that changes on a periodic basis.
With an Expanded Subscription to E6 CONNECT, you get over 68 additional courses to play (90+ total) and access to all content that has ever been released.
GSPro
Designed to be ultra-realistic with advanced ball physics and 4K graphics, what makes GSPro unique is its integration with the Open Platform Course Designer (OPCD), which allows anyone, regardless of skillset, to create courses that can be played by members of the GSPro community.
In addition, GSPro integrates with Simulator Golf Tour (SGT), a service that allows players to participate in virtual golf tours with weekly tournaments. You can even compete in the PGA Tour schedule.
Aside from the large community that is constantly building new courses (well over 450 are currently available) and playing in tournaments, GSPro offers:
- lifelike 4K graphics built with the Unity engine
- a driving range and on-course practice
- full course play (with flyovers)
- an OpenAPI interface
In my view, GSPro isn’t as suitable for tech-challenged golfers as other software, although you can keep yourself very busy with the practice and local play modes without getting involved in the community stuff.
The Golf Club 2019
The Golf Club 2019 (PC only) is best known for its massive course selection. More than that, it has plenty of features, and the fact that is was originally a video game ported to simulators means it has great graphics, sound and lighting.
TGC 2019 offers a selection of over 170,000 courses, many of which are user-designed. With the software, you can:
- play online (with strangers, friends or family) and compete in live worldwide tournaments
- play rounds solo, play with a CPU, or play multiplayer locally
- access the TGC library of over 170,000 courses
- do range, chipping or putting practice
Play formats include stroke play, match play, stableford, four ball, skins, and alternate shot. TGC has a cool feature that allows up to four players in a multiplayer setting to hit their shots at the same time.
You can also design your own course with a few clicks. A special editor allows you to customize everything in detail from the theme to the terrain and layout. If this is something you think you could have fun with, you could end up playing your own custom-created course with your QED.
Creative Golf

Creative Golf is a software that is focused not so much on realism (although the graphics aren’t bad), but more on family-friendly entertainment.
The base version of Creative Golf contains 15 reproduced golf courses from around the world. For an extra $500, you can get over 130 additional courses to play.
This software is even more affordable than TGC 2019, and if you want, you can “supercharge” it with the Golfisimo software which adds a host of cute, entertaining games for children and non-golfers.
The modes of Creative Golf are:
- Practice: Practice on a driving range or chip and putt on a course of your choice.
- Course Play: Choose the course, game type (stroke, match play, etc.), number of players, and play a full round of golf.
- Challenges: Participate in competitions locally (with friends or family) including closest-to-the-pin and long drive.
- Mini Games: Play fairy tale golf (altered environment, larger holes, etc.), mini golf (putting), and demolition golf (hit windows of old buildings).
- Online Game: Play a game type and course of your choice with anyone in the world. A Discord community is available to join.
- Tournaments: Join tournaments listed on the tournament server and compete with players around the world.
If you have purchased Golfisimo along with Creative Golf, there will be a dedicated Golfisimo section on the main menu. From there, you can access fun games like darts, barrels, bridges, demolition golf, battlefield, and grand slam.
For people that don’t need the realism of other software, Creative Golf and Golfisimo can be excellent money-saving alternatives.
Pricing & Plans
The base price of the QED launch monitor is $7000. This purchase includes the QED bar with bracket, all necessary cables and screws, 24 marked QED balls, club face stickers, calibration chart, and QED Ignite software.
Upgrades to the Refine and Refine+ software cost an extra $1000 and $2000, respectively.
Here are the current prices (subject to change) associated with the third-party software options that are compatible with the QED:
- E6 CONNECT: $300/year (basic) or $600/year (expanded) or $2500 one time
- The Golf Club 2019: $950
- Creative Golf & Golfisimo: $700 for CG, $500 for Golfisimo, $500 for Course Library
- GSPro: $250/year or $550+$250/year for the Lifetime add-on
Software may offer various add-ons such as premium courses for E6 CONNECT, which would come at additional cost.
Generally speaking, I recommend golfers grab GSPro with the QED (and with most other launch monitors that support it). This is because of the large, high-quality course selection, rich features, and affordability. In most golfing communities today, the general consensus is that it’s the best third-party software to use for golf simulators.
Where To Buy The QED Online
I recommend buying the QED from The Indoor Golf Shop. If you want to upgrade the Ignite software, you can optionally use the drop-down menu on the product page to select Refine or Refine+, and you can also add TGC 2019 or GSPro with one click.
The Indoor Golf Shop has a fantastic support team that will go out of its way to make sure you’re set up properly.
You can buy E6 CONNECT for the QED here. Creative Golf can be purchased from their own website.
Because the QED is a ceiling-mounted launch monitor that requires a connected PC for running software, you will normally need a golf simulator setup to go along with it. You can browse some of the best simulator packages that include projector, impact screen and enclosure right here.
Conclusion
The Uneekor QED is an overhead launch monitor that must be used with a software-running PC in order to view the data measurements, so in that sense, it’s less versatile than a portable launch monitor with direct-to-screen output like the Foresight Sports GC3.
Having said that, it’s one of the top launch monitors I recommend for an indoor golf simulator, along with Uneekor’s other launch monitor, the EYE XO. This is because:
- it provides a detailed set of ball and club data metrics
- its accuracy rivals the best launch monitors on the market while being much more affordable
- it integrates with the best, most feature-rich golf simulator softwares on the market
- it’s fast and reliable with virtually no shot delay
- it provides slow-motion video of the club and ball at impact
- no adjustments are needed for left and right-handed golfers
One of the main drawbacks of the QED is that it requires marked balls to use, so you can’t use your own balls. If you’re wedded to a particular ball that has certain flight characteristics, you’re going to have to leave that at the door when using the QED.
Additionally, there are a few advanced club parameters that the QED cannot measure such as angle of attack, dynamic loft, and impact point.
However, the QED delivers terrific value for the cost, and if you’re on the fence about it, I urge you to get off that fence right now and give it a try!
Thanks for reading my Uneekor QED review. Are you interested in the QED? Have you tried it already? What’s your experience? Tell us about it in the comments below.