
Golfstead is reader-supported. When you buy through links on the site, we may earn an affiliate commission at no extra cost to you. Our affiliations include, but are not limited to, the eBay Partner Network and Amazon Associates.

Over time, golf club grips will inevitably lose their tack.
This can be due to buildups of dirt, skin oils, and other substances that have accumulated on the grip. In this case, a good wipe-down with a damp cloth and a little bit of soap should do the trick in restoring the natural tackiness.
However, golf club grips can also lose their performance because they’re simply worn down from overuse or excessive grip pressure, and no amount of cleaning will fix it.
In this case, you’ll need to regrip your clubs. You can pay a professional to do it for you for around $50, but you can also do it yourself as a DIY project and save a decent amount of change in the process.
In this article, we’ll walk you through the best way to regrip your golf clubs. Let’s get started.
What You’ll Need
In general, to regrip golf clubs, you will need:
- a vise with a rubber vise clamp
- a straight blade or utility knife
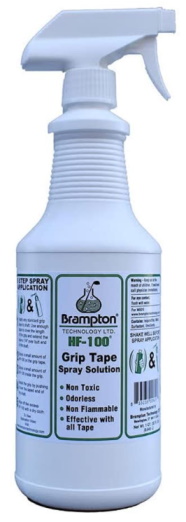
- a grip solvent
- a clean cloth
- 3/4″ or 2″ double-sided grip tape
Depending on which alternative methods you might want to use when removing the old grip or applying the new grip, you might need:
- a needle-tipped bottle for the solvent
- an air compressor with needle attachment
- dishwashing liquid and water
Of course, you will also need your new grips. You can select and purchase these based on your preferences.
Step 1: Remove the old grips.
There are a few proven ways to remove grips from a golf club. But before we continue, secure the golf club shaft in the vise, clamping it with the rubber vise clamp just above the end of the grip closest to the head of the club.
Cutting It Off
If you don’t want to keep the old grips and plan to throw them away, the best thing to do is simply cut them off the shaft.
Take your cutting tool and start at the low end of the grip, slicing through and about a third of the way down. Take care not to cut yourself or to scratch the shaft, especially if it’s graphite. Once there’s a large cut through the grip, just peel it off the shaft.
Using A Solvent
If you want to save your old grips, one good way to remove them is to inject a solvent between the grip and shaft so you can slide them off.
To do this, use a solvent can or bottle with a round-tipped needle attachment. Roll back the mouth of the grip and insert the needle, pumping solvent underneath. Move the needle around the shaft and try to cover as much area as you can.
Eventually, the grip will be able to simply slide off.
Using Compressed Air
The way to remove a golf grip without cutting or using a solvent is with compressed air, although this can be a little tricky to finesse.
Start by taking the air compressor nozzle fitted with a needle attachment, and insert it into the hole at the butt end of the grip. Then, send air into the grip.
The compressed air will expand the grip and separate it from the grip tape, allowing you to slide it off. Work some air in there and constantly try to pull the grip out.
Don’t go overboard with this! If the grip expands too much, it can explode and be ruined from that point on.
Watch the air pressure method for grip removal below:
Whichever method you use to get the grip off, you’ll then need to remove the old tape and adhesive from the shaft. Peel off as much of the tape as you can, and remove the remaining residue with solvent and a clean cloth.
Step 2: Measure and apply the grip tape.
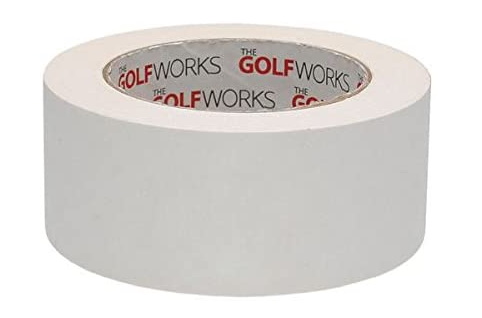
There are theoretically many different ways to secure a golf club grip to the shaft. However, the only way we recommend doing it is by using tape — specifically, double-sided grip tape that is designed for golf clubs.
There are other tapes you could possibly use such as masking tape, duct tape and even electrical tape, but you shouldn’t really consider these unless you can’t get a hold of any grip tape. You can buy double-sided golf grip tape on Amazon by itself or as part of a regripping kit.
1. Measure the tape.
First, line up the new grip with the top of the shaft to determine how much of the shaft needs to be covered with tape. Mark the end point with a non-permanent marker.
2. Apply the tape.
How you apply the tape to the shaft will depend on whether you’re using 3/4″ or 2″ grip tape, the latter resulting in a thicker and wider grip placement.
If you’re using 3/4″ tape, apply it in a spiral pattern from the tape endpoint to the butt end of the shaft. Make sure there is a bit of extra tape extending off the top, close it up and twist it, and snip off the excess.
If you’re using 2″ grip tape, apply it lengthwise starting from the tape endpoint. Wrap it around the entire shaft, twist it closed over the top, and snip off the excess.
We recommend doing the lengthwise method of grip tape application because it’s usually easier and quicker.
If you want increase the size of your grip, apply another layer of tape using the same method that you used to apply the first layer. The more layers of tape you apply, the thicker the grip will be.
Step 3: Apply the new grips.
There are two main methods of applying a grip to a golf club: using solvent and using compressed air.
Using Solvent
Use a golf tee to plug the hole at the butt end of the grip. Take your solvent and pour a fairly generous amount into the grip. Cover the other end of the grip with your hand and give the grip a shake to distribute the solvent evenly.
Then, pour the excess solvent through the grip’s vent hole onto the grip tape on the shaft, making sure all of the grip tape is coated. You should put some kind of container under the taped shaft to keep your floor clean.
Then, align the mouth of the grip with the butt end of the shaft and slide the grip on. The end of the shaft should be right up against the end of the grip. This will need to be done quickly (within a minute or two) while the tape is still slippery.
Using golf club grip solvent will be best because it only takes about two hours to dry. However, there are other solvent alternatives that include paint thinner, mineral spirits, and soapy water. If using soapy water, you might need the help of compressed air to slide it on and you’ll need to wait 24-48 hours for it to dry.
Using Compressed Air

The great thing about using compressed air is that you don’t need grip tape, meaning you can completely skip step #2 above. The downside is that being careless can result in the grip overinflating and exploding.
First, fit the mouth of the grip just over the butt end of the shaft. Then, take the air compressor nozzle fitted with a needle attachment and insert it into the grip’s vent hole.
Send quick bursts of air into the grip while pushing the grip down the shaft. The grip will slide over the shaft little-by-little until it is fully applied.
Conclusion
Many people prefer regripping golf clubs with compressed air because it eliminates the need to apply grip tape and solvent. However, using grip tape and solvent also works very well, and you can buy special regripping kits online that come with everything you need.
If you don’t have any handyman experience and you’ve never used a vise before, we suggest having your clubs regripped by a professional instead of doing it yourself. That way, you’ll be sure that it’s done properly and you won’t damage your clubs or run into problems down the road.
With your clubs successfully regripped, make sure that you keep them clean to maximize their lifespan and improve performance. Use a washcloth or soft-bristle brush wet with warm, soapy water, and then rinse and dry. We discuss cleaning grips and golf clubs as a whole in this article.
Thanks for reading this guide. How did you end up regripping your golf clubs? Drop a comment down below.

