
Golfstead is reader-supported. When you buy through links on the site, we may earn an affiliate commission at no extra cost to you. Our affiliations include, but are not limited to, the eBay Partner Network and Amazon Associates.
Putting is critical to lowering your scores in golf. And if you’re serious about improving your putting, being able to practice without needing to leave your house is a huge asset.
This is where putting greens come in. While nets and enclosures allow you to hit irons and woods without going to the range, putting greens similarly allow you to practice your putting (and often chipping as well) from the comfort of your own backyard.
Of course, not everyone can afford a professional outdoor putting green installation which normally costs many thousands of dollars. Fortunately, you can save a large chunk of that money by building one yourself with relatively inexpensive materials obtainable at your local hardware store.
So today, we’ll walk through a concise step-by-step DIY guide for building your own backyard putting green. This is certainly not the only way to build it, but we believe it’s one of the easiest and best methods that anyone with a bit of handyman skills can apply.
Preliminary Information
This guide will outline the process for constructing a backyard putting green with synthetic (artificial) turf, which we feel is suitable for most DIY backyard projects.
Developing a natural grass putting green like they do on golf courses is no trivial undertaking. It requires specific knowledge of sublayer composition, aeration, drainage, seeding, sanding, and other factors that are necessary to get the green in optimal shape and keep it there. Natural grass greens need to be continuously maintained.
Synthetic putting greens require almost no routine maintenance, but because the turf is typically non-porous, there are some important things that need to be done during construction in order to ensure proper drainage and avoid standing water issues.
Whether you plan to build a natural grass or synthetic putting green in your backyard, consider getting some feedback from an experienced installer. Even if you think you have fantastic DIY skills, you don’t want to make a mistake along the way that would be a big headache to deal with down the road.
What You’ll Need

Depending on the exact method you use to build your backyard putting green, you will likely not need all of the items below:
- synthetic turf for green or fringe
- garden hose with water
- washable spray paint
- sod cutter
- shovel and trowel
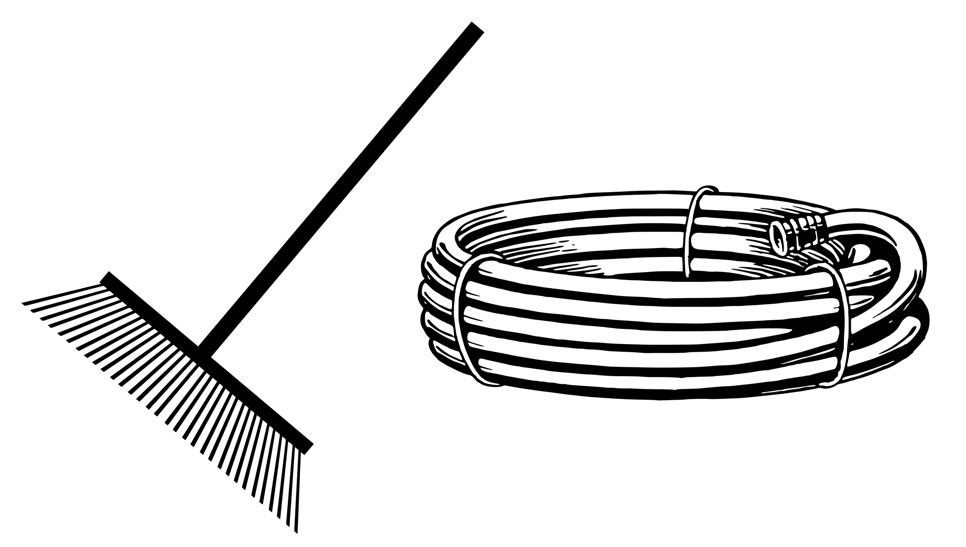
- rake
- hammer
- stakes or ground markers
- measuring tape
- spirit level
- landscape fabric (optional)
- carpet knife
- utility knife
- 1/4″ to 3/4″ crushed gravel or limestone
- plate compactor or lawn roller
- crusher fines
- 6-inch regulation golf cups
- golf cup sleeves
- hand tamper
- marking chalk
- landscape staples or nails
- seaming tape
- artificial turf adhesive
- notched trowel
- 50/100 silica sand infill
- drop spreader
- manual or power broom
- outdoor vacuum
- landscape edging
Where To Buy
Many companies, online or brick-and-mortar, sell synthetic turf suitable for backyard putting greens. We suggest getting it here on Amazon — you can order rolls up to 13 ft x 82 ft large!
The rest of the materials can be purchased online or at your local hardware store. To better ensure you get high-quality tools at great prices, you should check Amazon frequently.
Cost
When it comes to the cost of building a DIY backyard (outdoor) putting green, it’s just about impossible to give an exact dollar amount, especially in this current turbulent economy.
There are so many variable at play, including the size of the green, the supplies you already have, the materials you plan to use, and the prices in your local area.
However, as a DIY project, you can reasonably expect to spend around $5-$10 per square foot, so if you build a 200 square-foot putting green, it might cost you $1500. This is significantly cheaper than a professional installation which can run at $20-$40 per square foot.
Step 1: Select the site.
You can’t just put a putting green anywhere outdoors. Beyond having to own the space and/or have the proper permits to build the putting green, there are a few things you need to consider:
- You should aim for a site that is at least 500-1000 square feet. This will give you enough room to practice medium or long range putts and also have an extra cushion of space around the green for some breathing room.
- Avoid selecting a site that is on a steep slope. This can not only make it difficult to work, but it may also mean that your ball will constantly want to roll off the green. The slope should be gentle enough that a ball at rest on the green will stay at rest.
- Avoid selecting a site that is in a valley or spot where water tends to collect. Water needs to be able to drain away from the green.
- Make sure the site is clear of any hazards such as sprinkler heads, tree roots, or electrical equipment.
We suggest drawing a sketch so you can visualize what you want the green to look like. It can be pretty much any shape you want, whether it’s irregular, an oval or a rectangle. Keep in mind the roll sizes of artificial putting green turf available to you and factor that in to the size and shape of the green.
Once you know where the site will be, outline the desired shape of the putting green (including any fringe) with a garden hose, stakes, or ground markers. Then, mark the edge with washable spray paint.
Step 2: Excavate the site.
Now it’s time to dig out the area inside the outline you marked in the previous step.
When installing an artificial turf putting green, you should dig to a depth of six inches. Unless you want to rent a mini excavator for $400 a day, you’ll have to use a sod cutter or dig by hand with a shovel. Use measuring tape to verify the depth along with a spirit level to check.
At this point, you can take measures to try to prevent weeds from growing. This typically involves cutting to size and laying down a weed barrier (i.e. landscape fabric), but we don’t think it’s worth the extra work as landscape fabric doesn’t prevent weed growth very well.
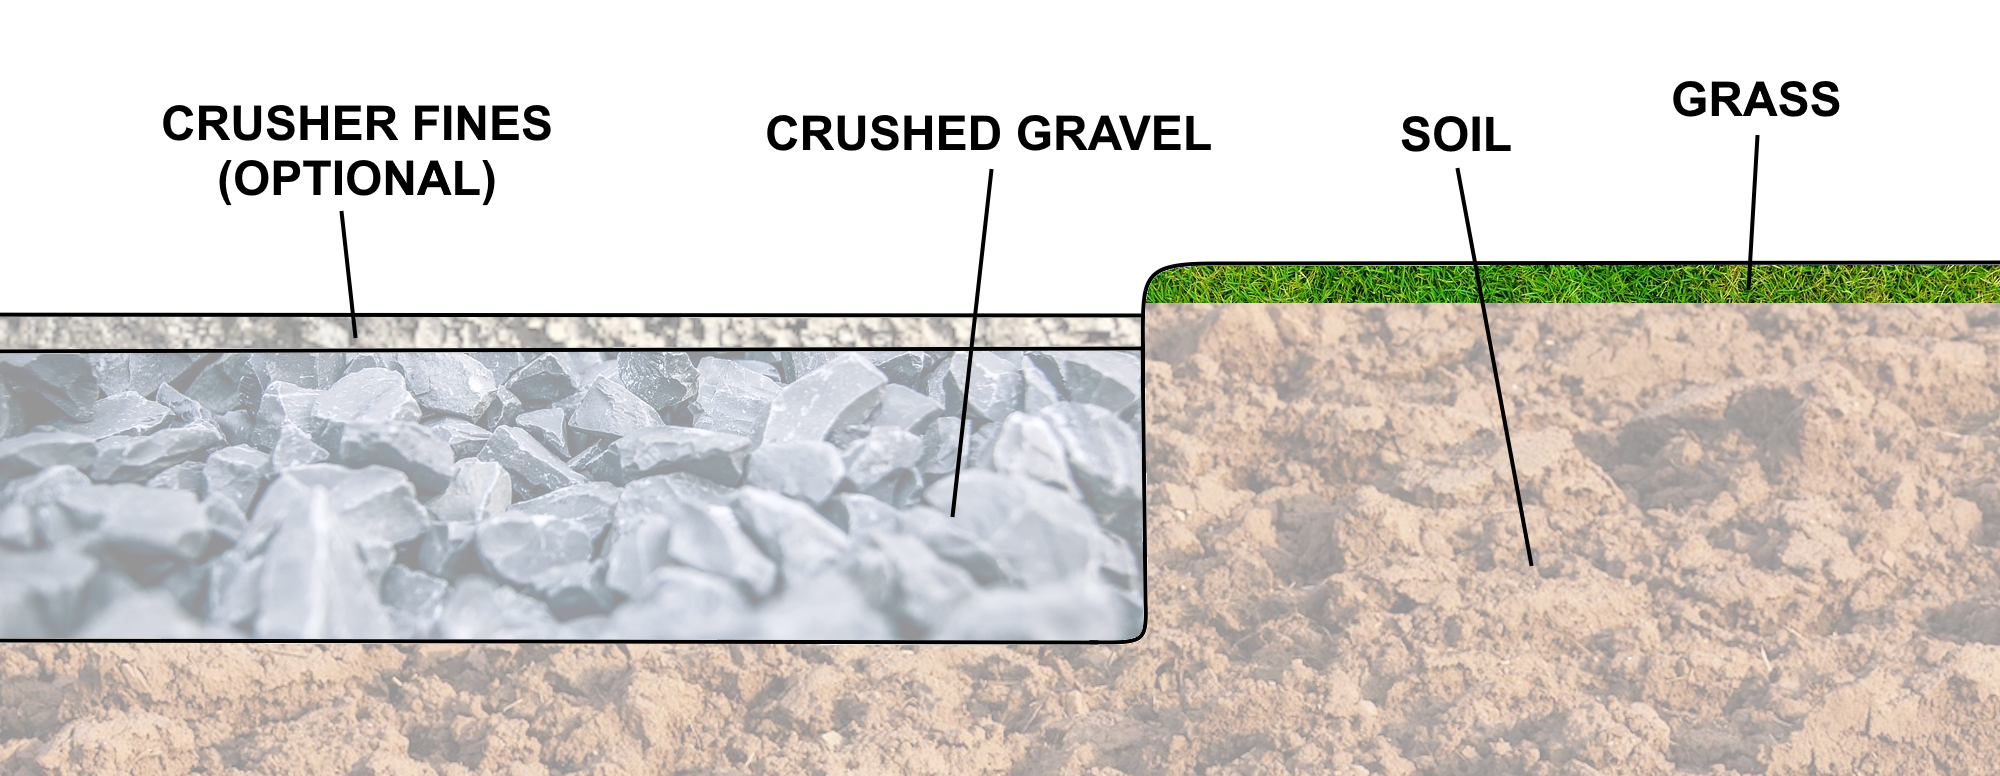
Now, approaches may vary, but the goal is to build a special sublayer in order to maximize stability and drainage. This sublayer is what the turf will rest on top of.
One of the best ways to do this is to fill the area with 1/4″ to 3/4″ crushed gravel or limestone. Fill it to a depth of approximately 4-5 inches.
If you plan to have undulations built into your putting green, now is the time to take care of that. Spread out the crushed stone relatively evenly with a rake, water it to make it more workable, and create the desired surface.
Tip: Putting green slopes should be gradual and not extreme. Avoid creating slopes greater than 2-2.5 percent, and use a spirit level to check. Also make sure there are no depressions that will collect water; water should naturally flow to the edge of the green from any location.
Then, use a plate compactor or lawn roller to compact and smooth out the surface. It’s very important that the crushed stone is compacted tightly, as otherwise it may further settle and sink after the green is already installed.
For an extra smooth surface, you can optionally add 0.5-1 inches of crusher fines on top, watering and compacting it like you did with the crushed stone.
Step 3: Insert the cups.

There is no one correct method of installing the cups into the sublayer, and different people may employ different methods. However, the general idea is to dig a hole out of the compacted sublayer so that the cup sits flush (or approximately flush) with the surface.
You can safely dig a hole with a diameter that is an inch or two larger than the diameter of the cup, as this will be backfilled and compacted later.
You can either use a cup sleeve or put the cup directly into the ground. If you’re using a cup sleeve, it should be as flush as possible with the sublayer surface. If you’re not using a cup sleeve, the top edge of the cup should sit around 1/8″ to 1/4″ higher than the surface of the sublayer.
Tip: Make the hole deep enough so that the edge of the cup sits slightly above the surface level. Then, use a hand tamper to gently push the cup down until it’s flush with the top layer.
Once this is done, fill the void surrounding the cup with the crushed stone you used in the previous step, water it, and make sure it’s fully compacted with a hammer. The immediate area surrounding the cup must be smooth and flat in order for the ball to roll properly.
Step 4: Apply the turf.
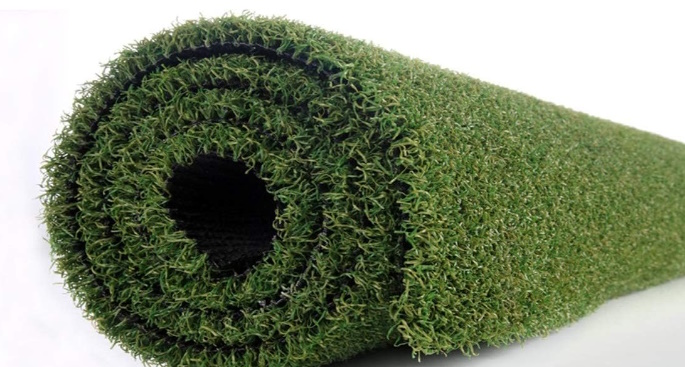
Now it’s time to get your roll (or rolls, depending on the size of the green) of artificial putting green turf.
Start on one side and roll the turf out over the excavated area. Any excess will obviously be fine since that will be cut away.
It will be much easier if one roll of the turf is able to cover the entire area of the green. This is why, if possible, you should buy a large enough roll in the first place so you don’t have to deal with seaming.
But if this isn’t possible and you need to use two or more rolls, start where the first roll ended and then roll out the second piece, making sure the grain is running in the same direction. As an initial step, overlap multiple rolls by a few inches.
Then, mark into the turf the desired shape of the putting green with some chalk, allowing some room for fringe if necessary, and cut off the excess with a carpet knife or utility knife.
If you’re not building a fringe around your putting green and you have no interior seams resulting from using more than one roll of turf, all you need to do now is secure the turf with landscape staples or nails.
As a last step, take your carpet knife and cut an X shape in the turf directly over the cups. Then carefully cut out the turf, following the perimeter of the cup. If you put a sleeve into the sublayer, you can now drop the cup in.
Seaming
Seaming, or joining the edges of two different pieces of turf, can be an involved process and is one of the trickier aspects of building a backyard putting green.
In fact, many consider it to be the key factor when installing a green, so when DIYing, you should do your best to avoid it by only using one piece of turf.
Below we’ll give the general process on how to seam two turf edges together. What follows is not rigorous, and you may need to do more research or get advice from a professional if in doubt.
- Cut off the factory edge of one of the pieces of turf (between the first and second rows of stitching) along the entire seam with a carpet knife. This will allow you to achieve a perfect seam and tight fit.
- Trim the other piece so that it joins to the first piece as flush and cleanly as possible without overlapping.
- Roll back the edges of the pieces of turf and place a strip of seaming tape underneath.
- Apply artificial turf glue to the seaming tape and spread it evenly with a notched trowel.
- Bring the turf edges back together onto the glued tape and press firmly for a clean, gapless seam.
Remember that it’s always better to have a slight gap in between the edges rather than a seam that is too tight. Take care not to get any glue on the turf grass itself.
Adding Fringe
If a fringe was part of your initial putting green design, you should have left some exposed sublayer around the putting green when cutting it out.
Fringing is another involved process and a tricky part of building a putting green. We won’t go over the minutiae in this guide, but the general idea is as follows:
- Lay pieces of fringe turf all around the outside, making sure to overlap both the inner putting green and the outer edge of the excavated area.
- Cut the fringe turf to conform to the shape of the putting green area with a carpet knife.
- Roll back the edge of the putting green and apply a strip of seaming tape.
- Lay the turf flat and press the fringe turf on top.
- Secure the fringe to the sublayer with nails or landscape staples.
Without the help of a professional installer, you’ll need to use your DIY skills and common sense to shape the fringe and properly seam it with the putting green.
Step 5: Apply the infill.
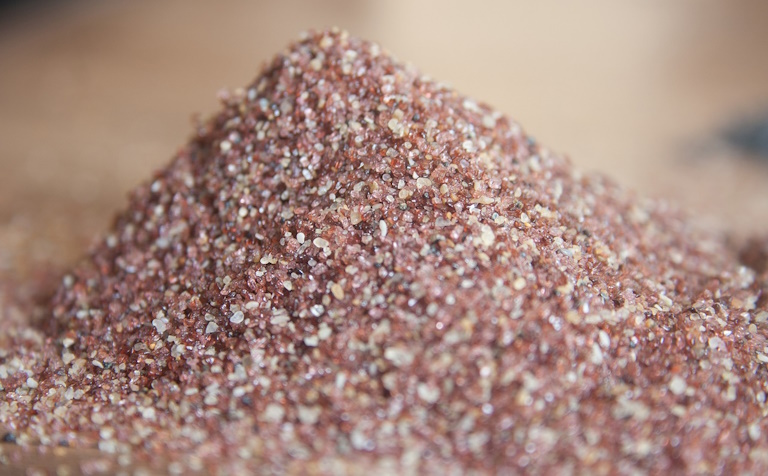
When you’re dealing with artificial putting green turf, it’s important to apply infill to the surface. Infill is small, granule-like material such as sand that is spread into the turf fibers.
For backyard putting greens, infill offers a number of benefits:
- it helps keep the artificial grass fibers upright so that the turf doesn’t get matted down or damaged in response to foot traffic
- it allows you to control the speed of the green, with more infill resulting in a faster green and less resulting in a slower green
- it makes the putting green surface look healthier and more vibrant
Infill engineered specifically for artificial turf is readily available at local hardware stores or online. We recommend 50/100 silica sand for putting greens.
The rule of thumb is that two pounds of infill is needed for every square foot of putting green, so multiply the square footage of your green by two to determine how much you need.
Apply the infill evenly to the putting surface (including the fringe if you have one) using a drop spreader. Then brush it into the fibers with a broom.
Step 6: Add finishing touches.
Now that you have the core of your backyard putting green installed, you may want to add some finishing touches to make the area look nice.
First use a Shop-Vac to clean up any debris that was created during the installation process, whether from cutting the turf or digging into the sublayer.
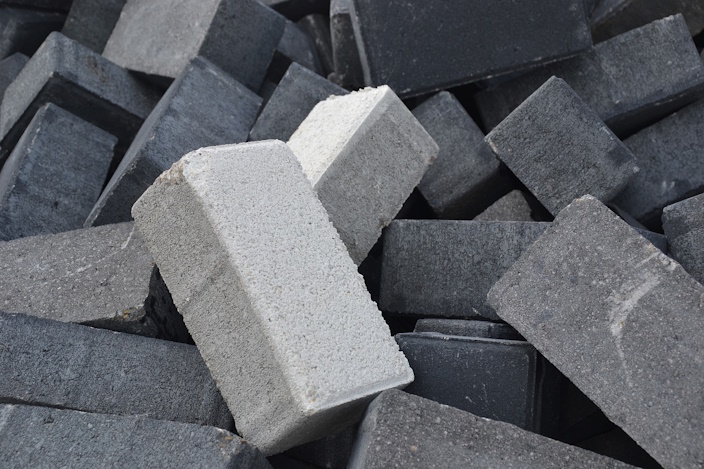
If your putting green has a fringe, you generally don’t need to do much else, especially if the surrounding area is already landscaped. But if you don’t have a fringe, you’re going to want to create a border around the putting surface, and it should sit at least an inch higher than the turf.
You can edge around the putting green with stone blocks, wood, rubber, brick, plastic, or even metal. We think stone looks best. Edging materials can be purchased at your local hardware store.
Edging not only enhances the aesthetic of the putting green, but it also prevents balls from rolling off the green. A fringe naturally serves this purpose because the blades are longer.
Maintaining Your Backyard Putting Green
As we previously mentioned, maintenance of an artificial putting green is minimal compared to a natural grass green, but there are still a few things to keep in mind.
First, never vacuum your putting green, as this will suck up the infill. If the putting surface is wet, it can also damage the vacuum cleaner.
Instead, to clean the turf, first remove any large pieces of debris such as branches and leaves, and then rinse the turf with a hose. This will help get smaller pieces of debris out from between the fibers but will not remove the infill.
Second, even with infill, the artificial turf can start to flatten after long periods of foot traffic. Hence, you should brush the green periodically with a broom or soft rake which will keep the blades of grass standing upright. For best results, fluff it up in the opposite direction of the nap.
A couple more tips:
- artificial putting green turf is normally stain-resistant, but if you happen to get a spot of mildew or have an accidental spill, it can be spot cleaned with mild detergent and water.
- weeds may grow through cracks or around the edge of the putting green and should be removed as soon as possible.
Also check the infill once every few months to make sure it’s evenly spread, and reapply if necessary.
Conclusion
While this DIY step-by-step guide on how to build a backyard putting green gives you a general overview of the process, it doesn’t cover all the details.
You may run into problems. Things may go wrong. You will probably save more than half of the cost of having it done by a contractor, but if you’re DIYing it yourself, it will be up to you to carry the project to success. Fortunately, it shouldn’t be too difficult if you’re careful, diligent, and use common sense.
Thanks for reading this guide. How did your backyard putting green project turn out? Feel free to leave a comment below. If you’re interested in how to build an indoor putting green, go here.


My dad took an interest in golf recently, and he is thinking of setting up a practice area in our wide backyard soon since we seem to have enough space for a small course. I’ll keep this in mind while I help him find a landscaping company in Josephine County to hire for the installation of artificial putting greens soon.