
Golfstead is reader-supported. When you buy through links on the site, we may earn an affiliate commission at no extra cost to you. Our affiliations include, but are not limited to, the eBay Partner Network and Amazon Associates.

Whether you’re an individual that dreams of having your own personal golf simulator, or you’re a business that’s looking for a great simulator system for commercial use, there has always been one stumbling block that trumps everything else: cost.
Golf simulators are expensive. And if you want a full simulator experience with a high-quality tracking system, projector, turf, screen & enclosure, and feature-rich software, they’re very expensive.
Because of the power of such a system and everything that goes into manufacturing it, the price simply comes with the territory. But the good news is that you can build some of the components of a golf simulator yourself and, in the process, save a substantial amount of money over buying a branded, ready-made product.
This is what this guide is for: teaching you how to build a full DIY golf simulator for your needs.
Of course, techy components like a projector or tracking system are not things you’ll generally be able to build yourself, but you can still save a tremendous amount of money by building whenever possible.
Note: If you’re interested in building a golf simulator without DIYing any of the components yourself, check out this guide.
Golf Simulator Components
Before we get into the meat of this guide, it’s important for you to be aware of the components of a golf simulator and their purpose. The ones you’ll likely be dealing with are:
Tracking System
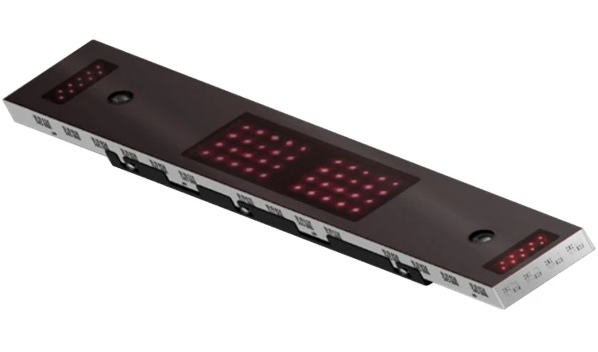
This is the technological core of a golf simulator. It measures ball and club data such as ball speed, spin rate, distance, club head speed, and club path, and it’s what makes golf simulation possible in the first place.
Without a tracking system, you have no simulator. Most affordable golf simulator setups use a launch monitor to measure data, but sensors and/or cameras mounted on the ceiling or in the ground may be used as well.
As we discuss in this article, launch monitors and tracking systems may use various technologies including photometric, stereoscopic, radar, and infrared.
Software

Whether you’re hitting balls on a virtual practice range, playing a round on a golf course, playing minigames/challenges or playing online, software is needed in order to take the data parameters measured by the tracking system and visualize them in a virtual environment.
Without golf simulator software, all you really have are numerical data points, and that’s not a true golf simulator.
Projector

A projector is not required to run a golf simulator, but it’s strongly recommended.
This device is what projects the digital feed of simulator software, running on either on a mobile device or PC, onto the impact screen so that you can see your ball flight in front of you.
These days, you can find lamp, LED and laser projectors on the market. Lamp projectors are reliable and have been around for a long time, but laser and LED projectors require much less maintenance.
Impact Screen & Enclosure
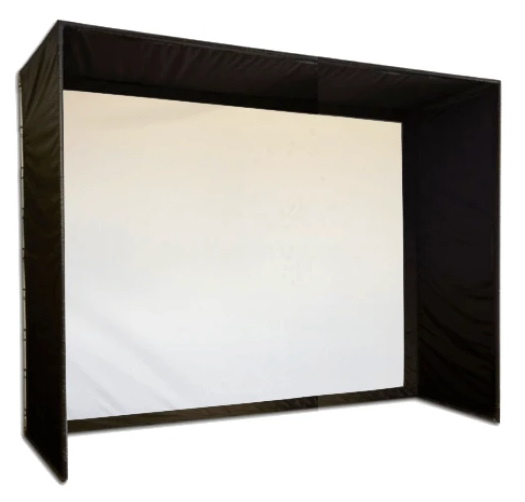
The impact screen is what you hit your balls into, and if you’re using a projector, it’s also the display canvas for your simulation software. Enclosures consist of side walls and upper walls that are designed to keep the ball from escaping sideways.
Typical simulator screens are flat, but you can also take it to the next level with a curved screen. Curved screens wrap around your periphery and are designed to give you an even more immersive experience.
Legitimate simulator screens are designed to withstand the impact of balls travelling at hundreds of miles an hour, for thousands of repetitions. Enclosures should be made of strong materials and serve to block out light so that the projection is easier to see.
Net
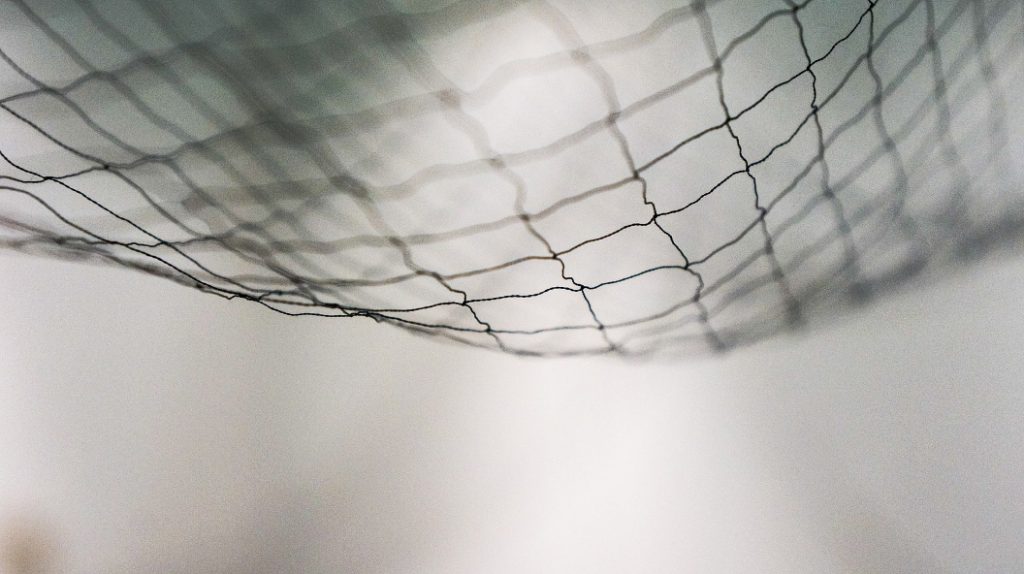
A net is a cheaper alternative to a screen & projector setup.
With nets, you generally need to view the golf simulation directly on your device, but there are some ways around this. For example, you can connect your software feed to your TV through HDMI and put the TV behind the net.
Like screens, nets are designed to withstand high-speed impacts from golf balls, and most net designs do a great job of containing poor shots as well. Some nets are even designed to return the ball to your feet after impact.
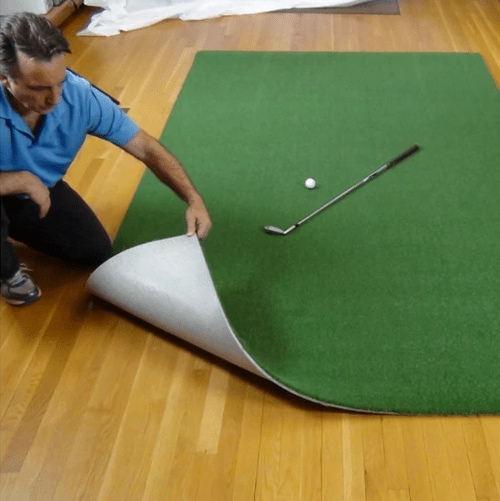
Hitting Mat & Landing Turf
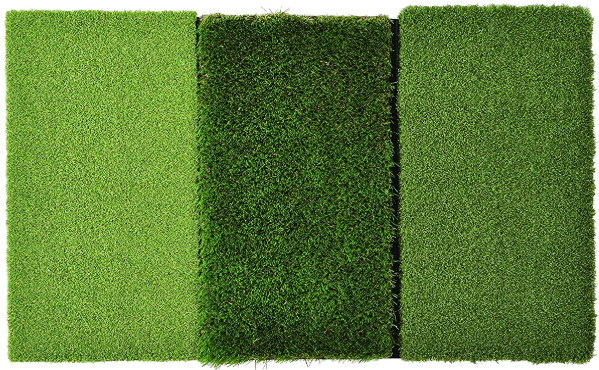
You can’t hit your golf shots off the carpet or hardwood floor, nor is it wise to let your balls land and bounce on these surfaces after every shot. This is where hitting mats and landing turf come in.
The hitting mat, as the name suggests, is the surface that you hit your shots off of. Hitting mats should be easy on the joints and provide a realistic fairway feel.
Landing turf protects your floors between the hitting mat and the impact surface. It gives your simulator a finished look and can serve as a putting and walking surface too.
Other Components
Other less-essential components you may be dealing with when building your DIY golf simulator are:
- floor or ceiling projector mounts
- side barrier netting
- monitor stands
- lighting systems
- putting greens
The great thing about DIY setups is that it’s easy to opt out of any optional components — for example, using a net (cheaper option) instead of a screen enclosure — and save even more on cost.
Building Your DIY Golf Simulator
Now let’s walk through making each of these components part of your DIY golf simulator setup.
1. Tracking System
Unless you’re a software engineer or employ a team of professionals, chances are you’re not going to be able to build a simulator tracking system yourself. These systems typically require advanced camera technology or sensors to measure club and ball data.
When it comes to tracking, look at manufactured brand-name solutions. For DIY simulators, we recommend ground launch monitors for a convenient, easy setup, but there are also powerful ceiling-mounted launch monitors available such as the Uneekor QED or EYE XO.
In general, the cheaper the simulator tracking, the less powerful it will be; it may measure less data parameters or be less accurate, for example. Some of our top recommendations for tracking are:
- SkyTrak Plus (ST+) Launch Monitor: incorporates photometric and radar technology to measure ball and club data with no stickers or special balls required: see our full review here; an upgrade to arguably the most successful launch monitor of all time; around $3000.
- Uneekor EYE XO Launch Monitor: a powerful camera-based tracking system mounted on the ceiling; around $7000.
- FlightScope Mevo Plus Launch Monitor: similar to the SkyTrak+ but uses radar technology and works more reliably outdoors; see our full review here; around $2000-$3000 depending on add-ons.
- Garmin Approach R10 Launch Monitor: an awesome budget unit under $1000, measuring plenty of parameters and integrating with the best software on the market; see our full review here; cost starts at $600.
- Uneekor EYE MINI Launch Monitor: essentially a portable version of the EYE XO; has an onboard display and provides a unique Club Optix slow-motion view of impact; see our full review here; around $4500-$6500 depending on package.
- Uneekor QED Launch Monitor: a more affordable version of the EYE XO; around $7000.
- FlightScope X3 Launch Monitor: a powerful radar-based launch monitor that is often used by Tour pros to prepare for tournaments; measures over 50 parameters; includes chipping and putting support; cost is at least $15,000.
Since you’re going the DIY route, you may be looking for something super cheap. In that case, we recommend something like the OptiShot 2 (infrared) or SLX MicroSim. Bear in mind that these kinds of inexpensive simulator systems are geared more towards entertainment rather than serious game improvement.
Whatever tracking device you choose should be compatible with simulation software to get the true golf simulator experience.
2. Software
This is another part of a golf simulator that the average Joe won’t be able to build themselves. In most cases, you’ll have to go for a branded solution.
Software goes hand-in-hand with the tracking system, taking the measured data parameters and converting them into a useful visual format that simulates actually being on a golf course.
Not all third-party software solutions are compatible with a given launch monitor or simulator system; there are technical workarounds that can allow you to use software that you normally wouldn’t be able to, but we don’t recommend most people go down this route.
Here are golf simulator softwares that are compatible with each of the tracking systems listed in the previous section:
- SkyTrak+: E6 CONNECT, The Golf Club 2019, WGT, Creative Golf, Fitness Golf, Golfisimo, and ProTee Play
- Uneekor QED & EYE XO: in-house software Ignite/View/Refine/Refine+, E6 CONNECT, TGC 2019, Creative Golf, GSPro
- FlightScope Mevo+: E6 CONNECT (trimmed or full version), various FlightScope apps on Android/iOS, TGC 2019, Creative Golf, Awesome Golf, GSPro
- Garmin Approach R10: Home Tee Hero, E6 CONNECT, Awesome Golf, TGC 2019, Creative Golf
- Uneekor EYE MINI: in-house software Ignite/View/Refine/Refine+, E6 CONNECT, TGC 2019, GSPro
- FlightScope X3: FlightScope VX app, E6 CONNECT, TGC 2019, Creative Golf, Awesome Golf, GSPro
As you can see, E6 CONNECT is widely available on most golf simulator systems. This is one of the most powerful software solutions on the market that has pretty much every feature you could ask for, including practice ranges, full course play, multiplayer formats, mini-games, skills challenges, and online tournaments.
There is, of course, more great software out there. The QED Ignite/View/Refine/Refine+ software is impressive, and I definitely recommend trying it out if you get a Uneekor system.
GSPro is widely considered to be the best software for golf simulators because of its realism, high-quality course selection, community features including course building, and affordability. TGC 2019 is another terrific software which offers an enormous selection of courses.
Golf simulator software isn’t cheap, but it’s necessary if you want to play your favourite golf courses from the comfort of your own home.
3. Projector
Projectors are an optional component of golf simulators, but they are probably not something you’ll be able to DIY.
Moreover, we don’t recommend skimping on an inexpensive brand-name projector that will either be too dull, produce a poor picture quality or have a throw ratio that is too high.
When it comes to golf simulators, it’s very beneficial to use a short throw projector that has a short throw ratio less than 1:1; this is so that you can position the projector in front of the hitting zone, eliminating the risk of shadows.
In addition, you want to use a projector with sufficient lumens to produce a bright image given the ambient lighting in the room. If you plan to keep your room dark, we recommend a projector with no less than 2000 lumens. A projector that produces 3000+ lumens is ideal and will ensure a bright and clear image at all times.
Here are a few of our top recommended projectors for golf simulators, which you can learn more about in our dedicated projector guide:
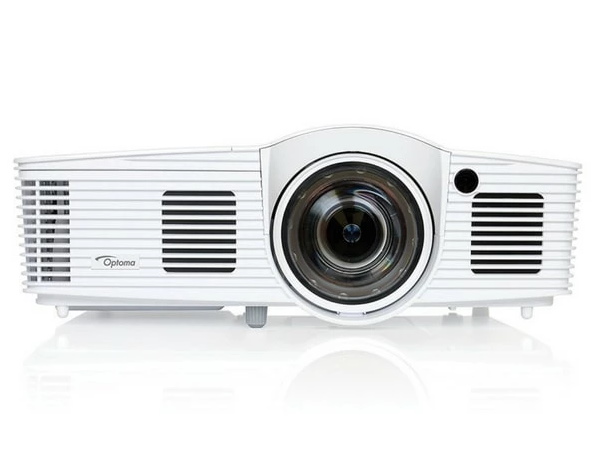
- Optoma EH200ST Short Throw Projector (1080p)
- BenQ LK936ST 4K Laser Short Throw Projector
- Optoma EH412ST Short Throw Projector (1080p)
It’s worth noting that the BenQ LK936ST is one of the only projectors designed for golf simulation applications.
Projector Mounting
There’s also the matter of mounting. Your projector can be mounted on the ceiling or the floor. Floor-mounted setups are more portable and don’t require hardwiring.
If mounting on the ceiling, we recommend simply buying a ceiling mount, which are available for well under $100.
Ground floor mount enclosures are more expensive to buy, but they can be built relatively cheaply with cutting tools, sturdy boards, turf or felt for covering, and plexiglass. Find out more about this here.
4. Impact Screen & Enclosure
This is the first component on our list where you can take a DIY approach to save a good amount of money over a commercial enclosure kit.
Before I continue, I should say that there’s already a good way to save significantly without buying a ready-made enclosure: use The Indoor Golf Shop’s DIY enclosure kits.
These kits contain everything you need (including the impact screen) to build your enclosure except pipe framing, which you can get at your local hardware store. Doing it this way can save you thousands of dollars.
Now let’s get to building a DIY screen enclosure from scratch:
Building The Enclosure
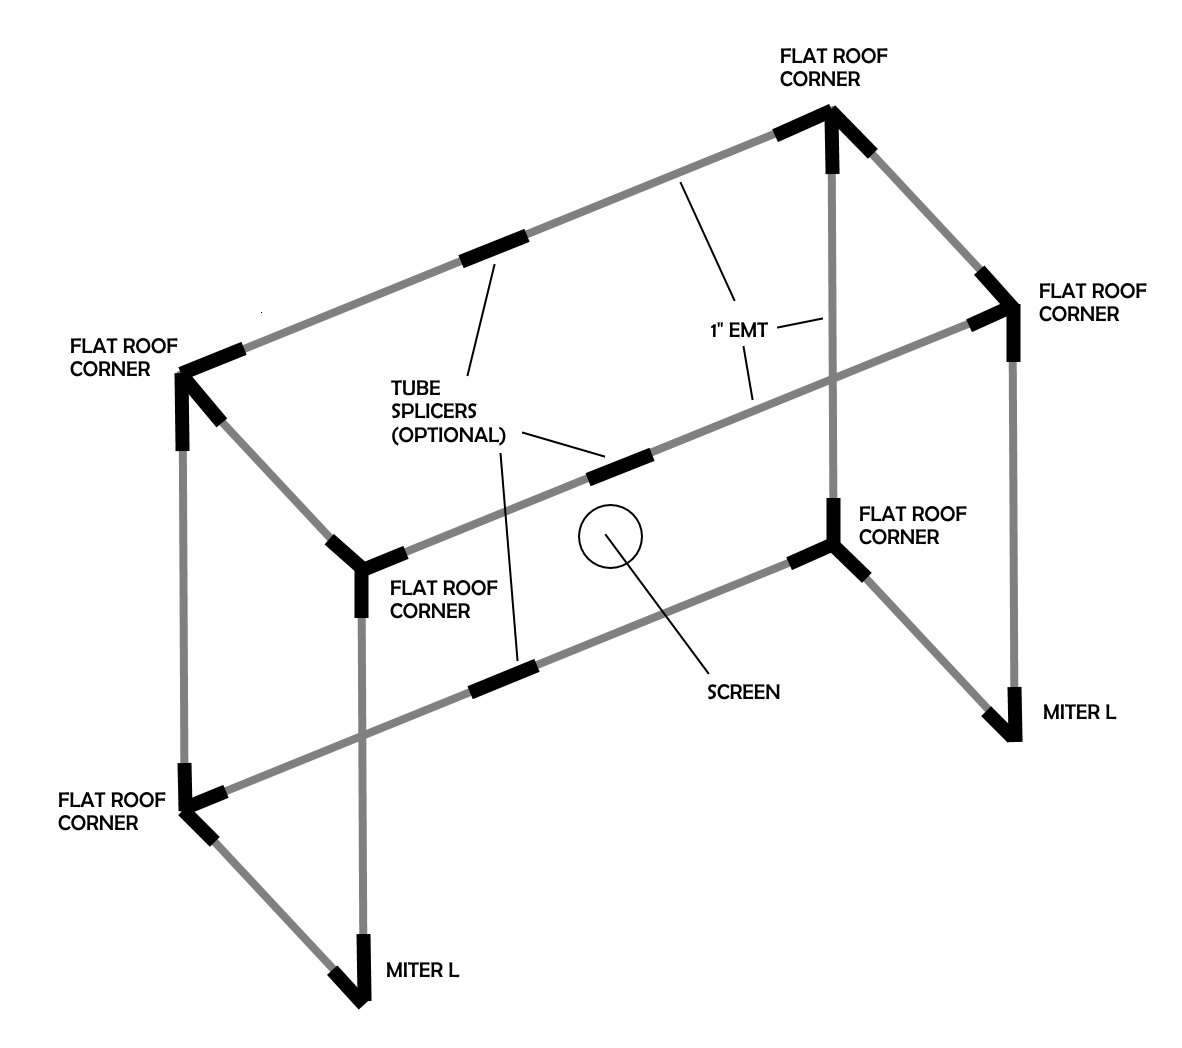
It’s quite easy to build your own screen enclosure. Depending on where you live, the size of the enclosure, and material costs, you can expect to spend around $700 to make it. It only requires a few materials:
- 1″ Electrical Metallic Tubing (EMT): buy 11-12 10-footers
- a pipe cutter or reciprocating saw with metal-cutting blade
- 6 flat roof corner fittings
- 2 miter L fittings
- 3 tube splicers if width of enclosure is longer than length of one EMT pipe
- foam pipe insulation
The basic process for building the enclosure is this:
- Cut all pipes to the length that will achieve your desired enclosure size (see above diagram).
- Fit the pipes into the connectors (and splicers if necessary) and square everything up.
- Tighten the connector screws.
Attaching The Screen
Once the frame is built, you need to attach a screen.
You can buy branded impact screens or impact screen material and fit it to your enclosure. One of the best sources for this is The Indoor Golf Shop, which sells both finished screens (with edges and grommets) and raw screen material.
Tip: If taking the latter route, we recommend buying at least four more feet of material than you need; this way, you can shift new screen into the impact zone as other screen regions wear out.
Most methods for attaching the screen involve bungee cords. In this guide, we recommend using ball bungees, tube clips and tarp clips:
- Starting from one corner of the screen, wrap the screen over the pipe and secure it with a tube clip.
- Move gradually to the opposite corner of the screen, using a tube clip every few feet or so.
- Use bungees and 5-6 tarp clips to secure each side.
- Wrap the screen around the bottom bar and secure it with a tube clip every few feet.
Covering The Sides & Top
Next is to cover the sides and top of the enclosure. For this, we recommend durable black cloth that blocks light. Buy the length of material you need for your enclosure size, and then:
- Start from the bottom of one side of the enclosure.
- Secure the cloth using tube clips every 4-5 feet or so, moving up the side, over the top, and down the other side.
- To cover the gaps on each side of the screen, wrap some cloth around the back of the screen and secure it with the same clips used to secure the screen.
The last thing to do is cover all of the EMT pipes with foam insulation, which will prevent hard bounces from your golf ball making impact with the metal.
There are many more things you will likely need to take into account when building your DIY screen/enclosure setup. What we’ve written here is a concise summary, but fortunately, there’s a much more detailed guide walking you through the process here.
5. Net
Ready-made golf nets can be quite expensive, especially when you’re paying for a particular brand name. Fortunately, it’s quite simple to build your own DIY net that costs you less than $100, although the cost will depend on the size of net you’re going for.
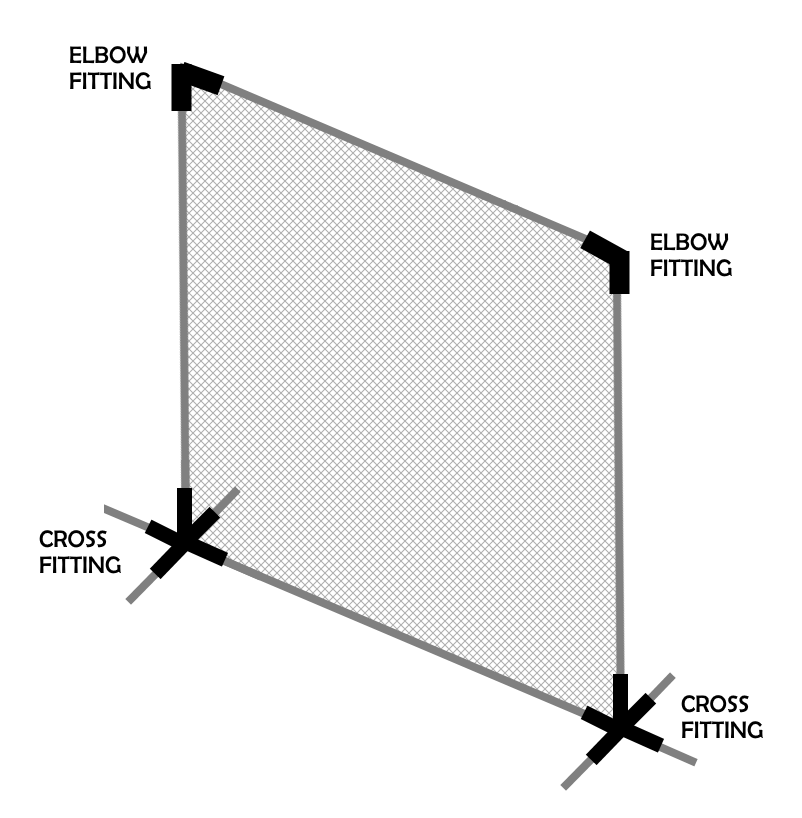
There are many creative ways you can construct a golf net. But for a standalone net, one of the best methods will require:
- high-impact netting (get a little more than your intended net size)
- 5 1.5″ PVC pipes (10′ for a 10ft x 10ft net, or whatever size you want your net to be)
- 2 1.5″ PVC 5-way cross fittings
- 2 1.5″ PVC elbow fittings
- screw hooks or eye hooks
PVC is a better option than metal because it’s less costly, resists corrosion (if using the net outdoors), and is easier to work with. It’s also safer for golf balls to impact.
The basic process for constructing the frame is:
- Attach cross fittings to either side of a PVC pipe. This will be the base of the frame.
- Attach two more pipes to form the vertical part of the frame.
- Using a pipe cutter or similar tool, cut one of the pipes into sixths, and attach the pieces to the cross fittings at the base, forming the support legs.
- Using the two elbow fittings, connect the last pipe to the vertical portions, forming the top of the frame.
All that remains now is attaching the net. Once you have the surface area ready:
- Drill two or three holes on the inside of each side of the frame.
- Insert the screw hooks or eye hooks into the holes.
- Use the hooks to secure the net to the frame.
You may have to modify this process slightly depending on the size of your net. Just keep in mind that DIY nets tend to be less reliable and less durable than pre-manufactured or brand-name nets.
If you want more ideas for building your own DIY golf simulator net, go here, here or here.
6. Hitting Mat
There are two main components to a hitting mat: the stance mat and the hitting strip.
A stance mat eliminates the need for you to stand on a hard floor or other unrealistic surface while setting up over the ball. In addition to being more realistic, it also makes swinging the club more comfortable, puts your feet level with the ball, and allows you to engage the muscles you would normally engage on real golf course grass.
Believe it or not, some people just hit off a thick welcome mat that you would lay at your doorstep; this is a very cheap solution, but obviously not the most effective, and you would need to use a mat that has a decent feel.
To build a durable hitting mat that will be able to withstand the impact of your clubs, the goal is to have a strong, sturdy base. One of the best ways to do this is to use plywood in conjunction with foam insulation to reduce impact shock.
We don’t recommend DIYing the top layer that will come into direct contact with the club (i.e. the hitting strip). These are manufactured in a very specific way to be able to withstand high-speed impact, emulate the feel of real course turf, and minimize the stress on your body.
You can buy small, cheap practice mat inserts that cost a few bucks, but what we recommend doing is looking at the hitting strips offered by The Indoor Golf Shop. They sell three different inserts: the SIGPRO Softy (super soft, realistic feel), SIGPRO 3D (very durable, withstands high-volume use), and Preferred (well-balanced performance at a more affordable cost).
Let’s talk about DIYing a stance mat, which will also serve as a base underneath a hitting strip that you will insert. For the method we’ll be covering in this guide, you will need ($100-$200 estimated cost):
- 2 sheets of sheathing plywood (4’x8′ or whatever size you want for your hitting mat)
- 1 foam insulation board (same size as plywood)
- interlocking foam tiles
- outdoor carpet (enough to cover entire area)
- hitting turf mat insert
- construction adhesive
From bottom to top, the layers will be: plywood, insulation board, plywood, foam tiles, outdoor carpet.
The hitting mat insert will be placed into a cutout through the carpet and foam tiles. Cuts can be made as needed to create the desired size of mat.
Here’s the general process:
- Glue the foam insulation board to one side of the plywood.
- Glue the other sheet of plywood to the insulation board.
- Glue interlocked foam tiles to the plywood board.
- Glue the outdoor carpet to the foam tiles.
- Mark the area where you want the turf insert to be and make a cutout until you reach the plywood.
- Insert the hitting strip.
If you’re using a SIGPRO insert that we mentioned above, the cutout will need to be at least 28″L x 12″W.
With this style of stance mat, the plywood adds strength while the foam layers add some softness and comfort to the impact. You can get a visual of this type of mat here.
Tip: It can be a good idea to buy multiple hitting strips and insert them in different locations on your mat. This gives you more surface area to hit from when other spots have worn out. You can rotate your mat to move the positions of the strips as well.
There are many creative ways the average Joe with some handyman knowledge can build a decent hitting mat. When it comes to the stance mat, it’s usually a good idea to go the DIY route because brand-name solutions tend to be overpriced.
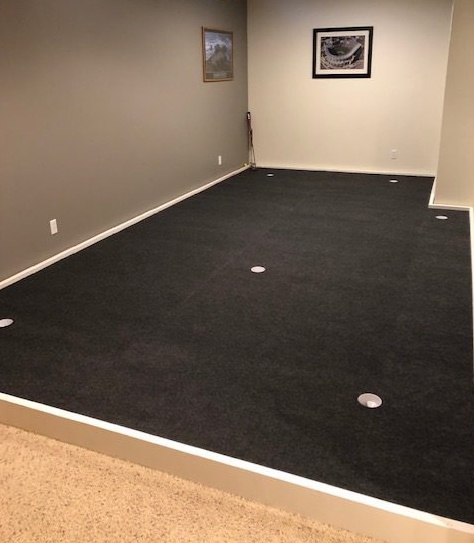
7. Landing Turf
There’s a cheap and simple way to take care of the issue of landing turf: just buy any kind of inexpensive turf (preferably turf that looks like grass to keep the look congruent) or carpet at your local hardware store or online. You can even get turf from places like Craigslist or fitness centers.
There are a couple of things to keep in mind. First, make sure the turf is thick enough to protect your flooring — a half an inch should be enough. Second, if you plan to hit putts, it’s a good idea for the turf to have a decent stimp reading.
If you’re not buying a professional DFY solution, this is by far the best approach to take.
8. Other Components

In this guide, we’ll briefly go over what to consider when it come to side barrier netting and putting greens:
Side Barrier Netting
If you want to add side nets to your golf simulator setup to contain shanks, all you need to do is buy sport netting barriers or protection side nets online or from your local sporting goods store.
Most side netting will have a hooking mechanism or require sandbags to keep it secure.
This side netting from Rukket Sports works great for multiple sports including golf, softball, baseball and lacrosse.
Putting Green
Building a DIY putting green is a whole other topic that deserves its own article.
Outdoors, you can build an entire putting green complex, digging up the sod, carving out cups, installing turf, and landscaping. For ideas on that, go here or here.
Indoors, you can build an effective putting green with AstroTurf, foam squares, and a carpet protector; see this video. We have also written a dedicated step-by-step guide for building your own indoor putting green here.
Camry Golf DIY Putting Green
For DIYers, what I recommend doing is buying putting green material from Camry Golf and following the DIY plan they provide.
Camry Golf turf has been used by PGA Tour pros including Webb Simpson, Kyle Stanley, and Ben Crane. It does a really impressive job emulating Tour-level greens, running at 11 on the stimpmeter and rolling true in every direction.
You will need to construct the base and frame of the putting green yourself, but only some basic tools are required. A general summary of the process is:
- Construct a 2×4 frame with horizontal beams for support.
- Top it off with particle board or a plywood sheet.
- Cut holes in the board for the cups using a hole saw.
- Optionally glue down underlayment on top of the base for a softer feel.
- Apply the turf with a carpet adhesive that is spread with a trowel.
- Cut X’s in the carpet where the holes are and insert the regulation cups.
You can also introduce break or slower uphill putts by using furniture levelers.
Above is a brief summary of the process; you can get the full details in the included DIY guide. Regulation cups are included with the purchase of Camry Golf turf.
Summary
However you want to mix and match your golf simulator, going the DIY route whenever possible will save you a lot of money as opposed to buying everything ready-made. Here’s what you can expect to save:
| DIY Combination | Estimated Cost Savings |
|---|---|
| DIY Mat + DIY Net | $600 |
| DIY Mat + DIY Screen | $750 |
| DIY Mat + DIY Screen & Enclosure | $1800 (depends on enclosure size) |
If you want a full simulator setup with projector, screen and enclosure, but at the lowest possible cost, your best bet is pairing your DIY components with the OptiShot 2.
The total cost of this kind of simulator shouldn’t be much more than a couple thousand dollars. By opting for just a net and mat, the total cost will be under $1000.
If you don’t mind spending more money for better and more accurate tracking systems, and you’re serious about improving your game, you can pair your DIY mat, net, or screen enclosure with a Garmin Approach R10, SkyTrak+, Mevo+, or Uneekor EYE MINI system.
Hopefully, this guide has made your dreams of owning a golf simulator more accessible. Happy DIYing!
Thanks for reading this guide. Is there something else you want to know about building a DIY golf simulator? Feel free to leave a comment below.


